티프로스
 자연 스트라이커 6★ 딜러 피해 티어 S+ 난이도: 보통 로도스 아일랜드
 평가
부착을 쌓아 터뜨리는 유형이 아닌 자연 스트라이커. 피해의 4분의 3 가까이가 「사냥 화살」로 스스로 일으키는 자연 폭발입니다. 배틀 스킬로 공중에 떠올라(잘 끊기지 않게 해 주는 방어 보호막을 두른 채) 한 번에 최대 2명을 노리는 공중 공격을 5회 퍼부으며, 자연 부착을 소모해 「계시」와 궁극기 에너지를 얻습니다. 계시가 8개가 되면 연계 스킬이 켜져 계시를 새 화살로 바꾸고 공중 공격 횟수를 되돌리며, 감속과 자연 폭발로 받는 피해 증가를 남기는 「화살진」을 깔아 둡니다. 광역 궁극기(「강력한 화살」과 「화살비」)와 연달아 터지는 폭발로, 한 방 핵이 아니라 꾸준한 피해로 보스와 무리를 모두 감당합니다. 대가는 자연 부착을 많이 요구하는데 그것을 공급할 오퍼레이터가 거의 없다는 점이라, 결이 사실상 필수 파트너입니다.
EndSync 티어 인덱스에서 — 배치를 정하는 방법.
장비 구성
엄선 팀 공략이 실제로 티프로스에게 장착시키는 것. 등장하는 모든 조합에서 집계했습니다. 분모는 항상 표시됩니다 — 반올림한 퍼센트는 없습니다.
무기
9/9 빌드
추운 밤의 그림자 6★ 아츠 유닛
공격력 505 · 민첩 +156 · 공격력 +39.0%
아츠 피해 +44.8% 장착자가 배틀 스킬을 사용한 후, 오리지늄 아츠 강도 +98, 4스택의 바람을 따라 획득, 15초 동안 지속. 해당 효과는 중첩되지 않고, 바람을 따라는 최대로 4스택까지 중첩됩니다. 장착자가 아츠 폭발 피해를 줄 때, 바람을 따라 1스택을 소모하고, 아츠 피해 +11.2%, 30초 동안 지속. 해당 효과는 최대로 4스택까지 중첩되며, 중첩될 때마다 지속 시간은 따로 계산됩니다. 0.1초마다 최대 1회만 발동합니다.
이것은 엄선 BIS 무기이기도 합니다 — 공략과 인덱스가 일치합니다.
장비
4/9 빌드
관문 장갑
오리지늄 아츠 강도: +26

관문 금속 장갑
오리지늄 아츠 강도: +44

관문 통신기
오리지늄 아츠 강도: +53
관문 통신기
오리지늄 아츠 강도: +53
4부위 관문 — 3세트 효과가 활성화되어 있습니다.
세트 관문은(는) 빌드 9개 중 9개에 등장하고, 이 네 부위 조합 그대로는 4개에 등장합니다. 다른 빌드의 부위를 섞지 않습니다 — 누군가 실제로 추천하는 빌드입니다.
완전한 투자를 전제로 한 엄선 선택. 인기는 무시하고 다른 질문에 답합니다. 이 오퍼레이터의 상한선은 어디인가.
BIS 무기
추운 밤의 그림자 6★ 아츠 유닛
공격력 505 · 민첩 +156 · 공격력 +39.0%
아츠 피해 +44.8% 장착자가 배틀 스킬을 사용한 후, 오리지늄 아츠 강도 +98, 4스택의 바람을 따라 획득, 15초 동안 지속. 해당 효과는 중첩되지 않고, 바람을 따라는 최대로 4스택까지 중첩됩니다. 장착자가 아츠 폭발 피해를 줄 때, 바람을 따라 1스택을 소모하고, 아츠 피해 +11.2%, 30초 동안 지속. 해당 효과는 최대로 4스택까지 중첩되며, 중첩될 때마다 지속 시간은 따로 계산됩니다. 0.1초마다 최대 1회만 발동합니다.
추천 장비
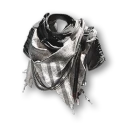
본 크러셔 머플러 · I
궁극기 충전 효율: +16%
관문 금속 장갑
오리지늄 아츠 강도: +44
관문 통신기
오리지늄 아츠 강도: +53
관문 통신기
오리지늄 아츠 강도: +53
3부위 관문 — 3세트 효과가 활성화되어 있습니다.
팀
티프로스은(는) 엄선 조합 9개(전체 72개)에 등장 — 그중 9개에서 딜러. 조합끼리 순위를 매기지 않습니다 — 의도적으로 그렇게 했습니다. 재미있어 보이는 것을 고르세요. 열면 콘셉트와 편성이 보입니다. 전체 공략은 앱에 있습니다.
Maygi - Arcane · Perlica · Gilberta
Arcane (WILL) · Perlica · Gilberta
Medium Boss / Single-target
Maygi - Arcane · Perlica · Gilberta
Arcane (WILL) · Perlica · Gilberta
The guide's reference team and the highest overall performer on a single target: Arcane gifts a Nature Infliction stack with her Combo and with her Ultimate, Perlica sets the loop tempo with her Combo, and Gilberta charges so fast she fits two Ultimates per rotation. A 57-second rotation, calculated at 71K team DPS with BIS weapons.







앱에서 4단계 로테이션 · 로테이션 변형 2개 · 장비 빌드 4개 · 장점 4 / 단점 4 · 주의점 5개 · 상성 메모 4개 · 영상 해설
Maygi - No Gilberta: Fluorite
Arcane (WILL) · Fluorite · Perlica
Medium Boss / Single-target
Maygi - No Gilberta: Fluorite
Arcane (WILL) · Fluorite · Perlica
The same rotation concept when you do not have Gilberta: Fluorite takes her seat and provides 3 free Nature Inflictions per rotation (against Gilberta's 2) at the cost of buffing nobody. A 55-second rotation and 56K team DPS. If you do not have Arcane either, the team with Antal as the "Arcane at home" has its own guide.

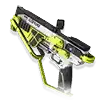
앱에서 3단계 로테이션 · 로테이션 변형 1개 · 장비 빌드 4개 · 장점 4 / 단점 4 · 주의점 3개 · 상성 메모 3개 · 영상 해설
Maygi - NO Arcane, no Gilberta: Antal
Antal · Fluorite · Perlica (no other 6-star)
Medium Boss / Single-target
Maygi - NO Arcane, no Gilberta: Antal
Antal · Fluorite · Perlica (no other 6-star)
The team for those who have neither Arcane nor Gilberta: no other 6-star operator. Antal plays "Arcane at home" with Detonation Unit and the Qingbo set, duplicating with his Combo the Nature Infliction Fluorite applies, at the cost of a 100 SP tax. The rotation concept is the same as the rest of the guide's teams; the author warns that without Arcane the results leave a bit to be desired, as her substitutes have little to no buffing.


앱에서 2단계 로테이션 · 로테이션 변형 2개 · 장비 빌드 4개 · 장점 4 / 단점 4 · 주의점 4개 · 상성 메모 3개 · 영상 해설
Maygi - Arcane · Ardelia · Liino
Arcane (WILL) · Ardelia · Liino
Low Boss / Multi-target
Maygi - Arcane · Ardelia · Liino
Arcane (WILL) · Ardelia · Liino
Very strong and simple: Ardelia is fed 100 SP for a massive, long-duration debuff, and Liino, Will-maxed, amplifies with her Ultimate and applies the Electrification Perlica used to. The downside is that only Arcane stacks Nature Infliction, so the rotation stretches to 75 seconds; in exchange it shines against several enemies. 69K team DPS, second in the video.




앱에서 3단계 로테이션 · 로테이션 변형 1개 · 장비 빌드 4개 · 장점 4 / 단점 3 · 주의점 4개 · 상성 메모 1개 · 영상 해설
YZ-月咒 - Arcane (WILL) · Perlica · Liino
Arcane (WILL) · Perlica · Liino; a 9-arrow cold start and an infinite 5-arrow loop
Medium Boss / Single-target
YZ-月咒 - Arcane (WILL) · Perlica · Liino
Arcane (WILL) · Perlica · Liino; a 9-arrow cold start and an infinite 5-arrow loop
The popular Typhoeus team according to the author: Typhoeus, Arcane in WILL form, Perlica and Liino. Perlica is the swappable seat — with Ardelia the single-target damage is higher and more extreme, but with Perlica there is one Battle Skill less to press, the axis reads simpler and more direct, and that makes it the version for anyone starting to learn the team; the Ardelia one goes in another video. The video focuses on understanding why the loop holds: 'I cast everything and the HP does not move' comes from not having understood Typhoeus. It all reduces to two cycles: the 9-arrow one, which cold-starts the team, and the 5-arrow one, which repeats endlessly.
앱에서 3단계 로테이션 · 로테이션 변형 2개 · 장비 빌드 4개 · 장점 4 / 단점 4 · 주의점 6개 · 상성 메모 2개 · 영상 해설
YZ-月咒 - Arcane (WILL) · Perlica · Xaihi
Arcane (WILL) · Perlica · Xaihi; no Gilberta, no Liino: one charge lap and one burst lap
Low (formulaic axis, per the author) Boss / Single-target
YZ-月咒 - Arcane (WILL) · Perlica · Xaihi
Arcane (WILL) · Perlica · Xaihi; no Gilberta, no Liino: one charge lap and one burst lap
The Typhoeus team without Gilberta or Liino: Arcane in WILL form, Perlica and Xaihi in seats 3 and 4, and Perlica can be swapped for Fluorite with the same plan. The author presents it as a formulaic axis for lazy players: two phases, one charge lap and one burst lap; the first charge lap starts with 9 arrows and every one after it needs only 5, and the author holds it is not behind the teams with Gilberta or Liino. The only thing to manage is the Cryo Infliction left by the Combo from Xaihi, and that is solved by turning it into Corrosion with the Battle Skill from Arcane, which even improves the total damage; it does not ask for fine hands.


앱에서 2단계 로테이션 · 로테이션 변형 2개 · 장비 빌드 4개 · 장점 5 / 단점 5 · 주의점 6개 · 상성 메모 3개 · 영상 해설
烟花弎月xyz - Arcane (WILL) · Gilberta · Xaihi
Arcane (WILL) · Gilberta · Xaihi; a level 4 Corrosion axis against the Skydrummer
Medium (four Cryo and synced Ultimates) Boss / Single-target
烟花弎月xyz - Arcane (WILL) · Gilberta · Xaihi
Arcane (WILL) · Gilberta · Xaihi; a level 4 Corrosion axis against the Skydrummer
A commented demo against the Echoes of War Skydrummer (死兽鸣吼, Brutal difficulty) with an account the author calls mid-to-high investment: Typhoeus 1+1 with her BIS weapon fully refined and ordinary supports (Arcane with 455 Will, Xaihi with 444 Intellect and Gilberta at potential 0 with Arcane's weapon borrowed). The idea is a Corrosion-specialized axis: stack four Cryo with Xaihi and convert them at once with the Battle Skill from Arcane into a level 4 Corrosion, and sync the Ultimate from Gilberta with the Combo from Typhoeus so her five arrows land with everything on top. The boss falls in 1:32. Without Gilberta, the author suggests Tangtang, Perlica or Ardelia, with no axis of their own.
앱에서 4단계 로테이션 · 로테이션 변형 2개 · 장비 빌드 4개 · 장점 5 / 단점 5 · 주의점 6개 · 상성 메모 2개 · 영상 해설
YZ-月咒 - NO Arcane: Purrchena · Perlica · Liino
Purrchena · Perlica · Liino; the 无诀队 (no-Arcane team): three charge laps and one burst lap, five arrows per lap
Low (quick-start guide) Boss / Single-target
YZ-月咒 - NO Arcane: Purrchena · Perlica · Liino
Purrchena · Perlica · Liino; the 无诀队 (no-Arcane team): three charge laps and one burst lap, five arrows per lap
The Typhoeus team for anyone without Arcane (无诀队): Purrchena takes the Nature Infliction seat the team needs no matter what, and Perlica and Liino stay as in the Arcane version. The author presents her as the best Arcane substitute for now: each Nature layer costs her 80 SP, or 60 if her shield blocks a hit, and according to the author she hangs it faster and with less SP than Fluorite, although as a pure applier she stays below Arcane. A 5-arrow axis: three charge laps and one burst lap, and the Combo from Typhoeus is saved to open the next lap, because its Barrage Array leaves 6s of Nature Burst DMG Taken. Purrchena's Combo and Ultimate have no fixed slot; the author also suggests her for high-pressure content, where survival matters.

앱에서 3단계 로테이션 · 로테이션 변형 1개 · 장비 빌드 4개 · 장점 5 / 단점 5 · 주의점 5개 · 상성 메모 2개 · 영상 해설
终末协约攻略组 - NO Arcane: Purrchena · Perlica · Xaihi
Purrchena · Perlica · Xaihi; the transitional Nature team: Typhoeus on basics and every Combo as soon as it lights
Low (no axis to memorize) General / Survival
终末协约攻略组 - NO Arcane: Purrchena · Perlica · Xaihi
Purrchena · Perlica · Xaihi; the transitional Nature team: Typhoeus on basics and every Combo as soon as it lights
The Typhoeus Nature team for newer players who do not have Arcane yet: Purrchena applies Nature Infliction with the second press of her Battle Skill, Perlica forces Electrification with her Combo and Xaihi fires her Ultimate, which grants Nature Amp. There is no axis to memorize: Typhoeus is controlled with basics and Final Strikes, and every Combo and every Ultimate goes out as soon as it lights. According to the author, the total damage sits somewhat below the usual teams, in exchange for the survivability Purrchena brings. Xaihi's seat accepts Gilberta, Liino or Arcane (WILL).
앱에서 3단계 로테이션 · 장비 빌드 4개 · 장점 5 / 단점 4 · 주의점 4개 · 상성 메모 2개 · 영상 해설
A Nature Striker who does not stack Inflictions to detonate: almost three quarters of her damage are Nature Bursts she forces herself with her Hunting Arrows. Her loop is short and modular (Battle Skill, Combo ASAP, stack Nature Infliction, repeat) and the damage comes out steady instead of as a nuke. She is hungry for Nature Inflictions and very few operators feed her: Arcane is the obvious partner.
파일
- 코드네임
- 티프로스
- 소속
- 로도스 아일랜드
- 종족
- 살카즈
- 성별
- 여
- 생일
- 1월 13일
- 성우
- 皛四白 (CN) · Hanna Johansson (EN) · 大空直美 (JP) · 채림 (KR)
파일 읽기 2개 항목
오퍼레이터 티프로스, 로도스 아일랜드 출신인 리컨비너. 사미의 잃어버린 전설을 좇는 여정 중 관리자와 우연히 만났으며, 이후 관리자의 초청을 받아 엔드필드 공업에 합류했다. 티프로스 씨와 대화를 나누며 느낀 점은, 그녀가 보이는 침착함과 차분함이 어른을 훨씬 넘어선다는 것이었다. 하지만 왕성한 호기심과 때때로 숨기지 못하는 탐구심 어린 눈빛은 그녀가 아직 아이라는 사실을 그대로 드러내고 있었다. 절차상 내가 그녀에게 물어봐야 할 것이 많았다. 하지만 그녀가 자신의 노트를 꺼낸 순간부터, 나는 질문할 타이밍을 좀처럼 잡을 수 없었다. 이렇게 많은 질문을 할 수 있다니, 나조차 감당하기 힘들 정도였다. 나는 그녀에게 많은 질문의 답은 에서 찾을 수 있다고 알려 주었다. 그러자 그녀는 펜을 한 바퀴 빙글 돌리고는, 내가 이야기를 설명하는 방식이 무척 흥미롭다고 차분히 말했다. 세 시간에 걸친 질문 공세가 끝난 뒤, 그녀는 만족한 듯 자리를 떠났다. 그리고 그녀가 노트를 덮기 직전, 나는 그녀가 나에 대해 남긴 평가를 볼 수 있었다. '머리가 셋. 모르는 것이 없고, 무엇이든 물으면 답해 준다. 전설 이야기에는 늘 이런 역할이 필요하다.' - 엔드필드 인사 보조 마틴 마빈 말렌
티프로스처럼 야외 생존에 능한 오퍼레이터가 합류한 덕분에, 북쪽에서의 업무는 훨씬 수월해졌다. 엔드필드는 철의 서약군과 긴밀히 협력하고 있지만, 그쪽은 전황이 급박해 오래 자리를 비우기 어렵다. 대개 우리를 균열 발생 지점까지 안내한 뒤에는 곧바로 전장으로 돌아가야 했고, 남은 작업은 결국 우리 힘으로 해결해야 했다. 극지 환경은 복잡하다. 사시사철 눈으로 뒤덮여 있고, 기온도 매우 낮아 우리의 감시 작업에 많은 어려움을 주었다. 한 번은 갑작스러운 눈보라가 생활 구역을 덮쳐 모든 시설이 무너지고, 설비도 전부 작동을 멈춘 적이 있었다. 절망 속에서 우리는 가진 담요를 모두 몸에 두른 채, 이 눈과 얼음에 삼켜지기만을 기다리고 있었다. 다행히 그때 오퍼레이터 티프로스가 제때 도착했다. 그녀와 함께 나타난 것은, 짐승의 다리 한 짝이었다. 폐허 한가운데에서 티프로스는 모닥불을 피우고, 사미식 고기구이 한 끼로 우리에게 온기를 되찾아 주었다. 이후에는 홀로 눈보라 속으로 들어가 나무와 나무껍질을 가져왔고, 단 한나절 만에 아무 기반도 없는 환경에서 네 사람이 몸을 의탁할 수 있는 오두막을 지었다. 우리가 가져온 설비에 대해서는 전혀 몰랐지만, 그녀는 우리가 설명한 조건에 맞춰 장비가 안정적으로 작동할 수 있는 환경을 마련해 주었다. 우리가 균열과 직접 마주했을 때도, 그녀는 사냥 경험을 바탕으로 몰려드는 아겔로스 무리를 빠르게 처리했고, 우리가 장비를 배치해 핵심 데이터를 확보할 수 있도록 도왔다. 야외 생존 경험을 제외하고도, 모두가 그녀를 가장 믿게 된 이유는 놀라울 만큼 정확한 예감이었다. 물론 동료의 예감에 의지해 일한다는 말이 전문가답게 들리지 않는다는 건 안다. 하지만 모든 내비게이션 장비가 먹통이 된 상황에서, 우리는 그녀의 예감 덕분에 가까스로 위험을 피하고 무사히 철수할 수 있었다. 이동하는 내내 우리는 마음을 졸였지만, 그녀는 조금도 두려운 기색을 보이지 않았다. 늘 침착하게 눈보라 속에서 모두가 나아갈 길을 가리켜 주었다. 누군가는 산맥에 사는 사이클롭스가 티프로스에게 미래를 내다보는 법을 가르쳐 준 것이라고 추측했다. 하지만 나는 그것이 어쩌면 사미인이 자연과 함께 살아가는 방식일지도 모른다고 생각한다. 그 안에 몸을 두고, 그 일부가 되어야만 자연의 숨결과 맥박, 심장 박동을 예민하게 느끼고, 자연이 내려 주는 '계시'를 받을 수 있을 테니까.