ペリカ
 電磁 術師 5★ バッファー サポートティア S+ 難易度:低 エンドフィールド工業
 評価
万能の付術役。ほぼすべてのアーツアタッカーの連携技を(すでに付いている付着を無視して)起動でき、SPを使わずに感電を強制し、ブレイクも安定して取れます。ペリカの感電は受けるアーツダメージを上げる独立枠の倍率で、チーム全体の火力を底上げします。編成の9割に入り、サブアタッカーもこなせます。
EndSync ティア索引より — 配置の決め方。
装備構成
厳選チーム攻略が実際にペリカに装備させているもの。登場する全編成で数えています。分母は常に表示 — 丸めたパーセントはありません。
武器
9/23ビルド
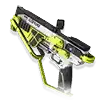
荒野迷走 5★アーツユニット
攻撃力411 · 知性+124 · 電磁ダメージ+34.7%
アーツ強度+28 装備中、自身が敵を感電状態にするとき、15秒間チーム全員の物理ダメージと電磁ダメージ+22.4% 同名効果は重ね掛け不可
使用例あり
-

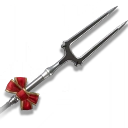
弔いの詩 5★アーツユニット
攻撃力411 · 知性+124 · 攻撃力+31.2%
8/23ビルド
-
遺忘 6★アーツユニット
攻撃力495 · 知性+156 · アーツダメージ+43.3%
5/23ビルド
-

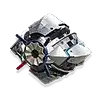
破壊ユニット 6★アーツユニット
攻撃力490 · メイン能力値+132 · アーツ強度+78
1/23ビルド
装備
10/26ビルド
パルス式妨害服
アーツ強度: +26

流転ガントレットⅠ
必殺チャージの回復効率: +26.7%

パルス式校正器
アーツ強度: +53
パルス式校正器
アーツ強度: +53
3点 パルス式 — 3点セット効果が発動しています。
セット パルス式 は26ビルド中15ビルドに登場し、この4点の組み合わせそのものは10ビルドに登場します。異なるビルドの部位を混ぜることはありません — 実際に誰かが勧めているビルドです。
厳選の選択、完全育成を前提としたもの。人気は無視して別の問いに答えます。このオペレーターの上限はどこか。
最適武器
破壊ユニット 6★アーツユニット
攻撃力490 · メイン能力値+132 · アーツ強度+78
サブ能力値+28.0% 装備中、自身がアーツ爆発を発動させるとき、15秒間敵の受けるアーツダメージ+25.2% 同名効果は重ね掛け不可
サポート用の代替
-
遺忘 6★アーツユニット
攻撃力495 · 知性+156 · アーツダメージ+43.3%
-
荒野迷走 5★アーツユニット
攻撃力411 · 知性+124 · 電磁ダメージ+34.7%
推奨装備
パルス式妨害服
アーツ強度: +26

軽量超域ガントレット
アーツ強度: +44
パルス式校正器
アーツ強度: +53
パルス式校正器
アーツ強度: +53
3点 パルス式 — 3点セット効果が発動しています。
チーム
ペリカは厳選32編成(全72編成中)に登場 — そのうち1編成でアタッカー. 編成同士は順位付けしていません — 意図的にそうしています。楽しそうなものを選んでください。開くとコンセプトとメンバーが見られます。完全な攻略はアプリ内にあります。
Raaay丶 - Perlica main C (Arcane INT · Arclight · Liino)
Double Electrification for Perlica; Arclight is the SP engine
High (long axis; a simple version exists) Boss / Single-target
Raaay丶 - Perlica main C (Arcane INT · Arclight · Liino)
Double Electrification for Perlica; Arclight is the SP engine
The rotation class for the 诀佩弧梨 quartet (Arcane, Perlica, Arclight and Liino) by the author of the wheelchairs. The upfront warning: the team can be played the simple way, three supports and Arcane INT as the only C with the generic idea of converting two Inflictions into Corrosion, but if you chase the team's ceiling, Perlica and Arclight overturn the impression most players have of them and take the total damage and the axis to another dimension. Per the author's tests it is, among all the teams built around Arcane and Liino as the only six stars, the one with the highest ceiling and the most versatility, and overall it does not fall short of the author's 管诀赛钓 team. In exchange, strength is tied to investment: all four operators need raising, like the Perlica opening the video with a one-million non-crit hit.





アプリ内 6手順のローテーション · 2種のローテーション派生 · 4装備ビルド · 長所4 / 短所4 · 注意点6 · 相性メモ3 · 動画解説
Maygi — Rossi Hybrid
Mi Fu · Rossi · Gilberta · Perlica
High CC / Mobs & Elites
Maygi — Rossi Hybrid
Mi Fu · Rossi · Gilberta · Perlica
The fastest hybrid. Here Rossi is NOT the carry: she's played as a Vulnerability battery (3 stacks in one Combo+skill) for Mi Fu to consume. Gilberta and Perlica are one of the only sources of a free starting Vulnerability stack.

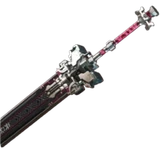




アプリ内 3手順のローテーション · 4装備ビルド · 長所3 / 短所3 · 注意点4 · 相性メモ1 · 動画解説
Maygi - Full Electric
Arclight · Perlica · Antal
High Boss / Single-target
Maygi - Full Electric
Arclight · Perlica · Antal
The benchmark Electric single-target team: stack lances on the field and recall them all at once with every buff stacked.

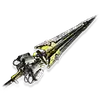

アプリ内 2手順のローテーション · 1種のローテーション派生 · 4装備ビルド · 長所4 / 短所4 · 注意点4 · 相性メモ3 · 動画解説
Electric + Corrosion
Perlica · Antal · Gilberta
High Flexible / AoE + Boss
Electric + Corrosion
Perlica · Antal · Gilberta
Gilberta comes in for Arclight and converts the Electric Infliction into Corrosion. The burst is the highest of the three teams, but her field lasts 5 s, so the timing is strict.
アプリ内 3手順のローテーション · 4装備ビルド · 長所4 / 短所4 · 注意点4 · 相性メモ2 · 動画解説
Comfort / Link
Akekuri · Perlica · Gilberta
Medium AoE / Comfort
Comfort / Link
Akekuri · Perlica · Gilberta
The comfortable version with Akekuri: her Link powers the recall with no stack timing. Lower ceiling, much easier to play.

アプリ内 2手順のローテーション · 4装備ビルド · 長所4 / 短所4 · 注意点4 · 相性メモ2 · 動画解説
Maygi - Cryo Perlica
Xaihi · Gilberta · Perlica
High Boss / Single-target
Maygi - Cryo Perlica
Xaihi · Gilberta · Perlica
Cryo hyper-carry: the team feeds her Inflictions and she cashes it all into a 220-cost Ultimate that unloads a hail of bullets.

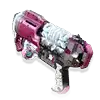

アプリ内 4手順のローテーション · 1種のローテーション派生 · 4装備ビルド · 長所4 / 短所4 · 注意点5 · 相性メモ6 · 動画解説
Zn0nym0us - Yvonne without Gilberta (Perlica and Ardelia)
Perlica · Ardelia · Xaihi; 4.5/5 — high F2P damage on the 90% timing of the Combo from Perlica
High (4.5/5 from the author) Boss / Endgame (no pre-fight prep)
Zn0nym0us - Yvonne without Gilberta (Perlica and Ardelia)
Perlica · Ardelia · Xaihi; 4.5/5 — high F2P damage on the 90% timing of the Combo from Perlica
The team for whoever lacks Gilberta (1.0-1.1 era): Ardelia takes the seat with her Combo Corrosion, her Physical Susceptibility and the Ultimate healing — without fixing the SP hunger, and with an exclusion rule the author makes plain: Ardelia and Gilberta together, NO — the Vulnerability from the Combo of Gilberta stops the one from Ardelia from firing. High damage and sustain in exchange for the finest timing in the guide short of the 5/5: the Combo from Perlica gets clocked at 90% of its cooldown.

アプリ内 2手順のローテーション · 長所3 / 短所3 · 注意点3 · 相性メモ1 · 動画解説
Maygi - Arts (Antal)
Perlica · Gilberta · Antal
High Boss / Single-target
Maygi - Arts (Antal)
Perlica · Gilberta · Antal
Rossi's highest-DPS Arts team: everything is built to squeeze her 27-hit Heat Ultimate.
アプリ内 3手順のローテーション · 1種のローテーション派生 · 4装備ビルド · 長所5 / 短所4 · 注意点5 · 相性メモ3 · 動画解説
Zn0nym0us - The easiest Rossi (F2P, no Gilberta)
Akekuri · Wulfgard · Perlica; damage 4/5 at difficulty 1/5, on the scale of the author himself
Very low (1/5 from the author; damage 4/5) Boss / Endgame (0 Ultimate at the start)
Zn0nym0us - The easiest Rossi (F2P, no Gilberta)
Akekuri · Wulfgard · Perlica; damage 4/5 at difficulty 1/5, on the scale of the author himself
First team of the «Gilberta-less and F2P» guide from Zn0nym0us (1.1 era): after the wave of players without Gilberta who could not run his original 13 teams, he spent days testing Gilberta-free lineups and this one stayed as the star recommendation for anyone starting out — «this might be the easiest Rossi team to play», with no complicated timings and high damage all the same. His whole series uses repeatable rotations from 0 Ultimate energy, built for the endgame where you are not allowed to start charged. The showcase runs a level 1 Eminent Repute on Rossi, on purpose: the sequence is what you copy.

アプリ内 2手順のローテーション · 1装備ビルド · 長所4 / 短所3 · 注意点3 · 相性メモ2 · 動画解説
Zn0nym0us - Premium Rossi with Tangtang (team damage)
Tangtang · Gilberta · Perlica; 5/5 TEAM damage — two limiteds and the early wave of the OLDEN STARE
Medium (3/5 from the author; team damage 5/5) Boss / Endgame (0 Ultimate at the start)
Zn0nym0us - Premium Rossi with Tangtang (team damage)
Tangtang · Gilberta · Perlica; 5/5 TEAM damage — two limiteds and the early wave of the OLDEN STARE
The most premium team of the 13-team guide from Zn0nym0us (1.1 era), honest nuance included: it is not the best PERSONAL damage for Rossi, but it is «one of the highest team damages in the game» for her. Tangtang brings Susceptibility, extra DPS and her lockdown — useful against specific boss mechanics. The whole series runs from 0 Ultimate with the showcase on a level 1 weapon.

アプリ内 3手順のローテーション · 1装備ビルド · 長所3 / 短所3 · 注意点3 · 相性メモ2 · 動画解説
Zn0nym0us - Rossi with Pogranichnik (the best personal damage)
Pogranichnik · Gilberta · Perlica; 5/5 with Breach all fight — and the final Breach after the Ultimate, for the snapshot
Medium (3/5 from the author; damage 5/5) Boss / Endgame (0 Ultimate at the start)
Zn0nym0us - Rossi with Pogranichnik (the best personal damage)
Pogranichnik · Gilberta · Perlica; 5/5 with Breach all fight — and the final Breach after the Ultimate, for the snapshot
«The best personal damage team for Rossi» of the 13-team guide (1.1 era): the Breach from Pogranichnik raises physical damage taken across the WHOLE fight — not only the burst — and feeds the basic, the Battle Skill, the Combo and the first talent from Rossi at once. A single rotation serves as opening and loop, and the author scores it 5/5 damage at 3/5 difficulty: «very simple».

アプリ内 2手順のローテーション · 1装備ビルド · 長所3 / 短所3 · 注意点2 · 相性メモ2 · 動画解説
Zn0nym0us - F2P Rossi with the crystal of the Endministrator
Endministrator · Wulfgard · Perlica; the crystal broken between sequences and two free stacks to reset
Medium (3/5 from the author; damage 4/5) Boss / Endgame (0 Ultimate at the start)
Zn0nym0us - F2P Rossi with the crystal of the Endministrator
Endministrator · Wulfgard · Perlica; the crystal broken between sequences and two free stacks to reset
The team «you can build entirely for free» of the 13-team guide (1.1 era): Endministrator, Wulfgard and Perlica around Rossi, with both house technical rules together — the Battle Skill from Wulfgard BEFORE the electric Combo (or his Heat consumes the Electrification leaving no Infliction) and the Crush from the Endministrator on his crystal BETWEEN the two sequences of the Combo from Rossi, returning «two free stacks to reset the rotation». 4/5 damage at 3/5 difficulty.

アプリ内 3手順のローテーション · 1装備ビルド · 長所3 / 短所2 · 注意点2 · 相性メモ1 · 動画解説
Zn0nym0us - The most requested Rossi (Wulfgard, Perlica and Gilberta)
Wulfgard · Perlica · Gilberta; difficulty 2/5 — the one the community asked for, with the Wulfgard-first rule
Low (2/5 from the author; damage 3.5/5) Boss / Endgame (0 Ultimate at the start)
Zn0nym0us - The most requested Rossi (Wulfgard, Perlica and Gilberta)
Wulfgard · Perlica · Gilberta; difficulty 2/5 — the one the community asked for, with the Wulfgard-first rule
«One of the most asked team comps I have seen through the community» (1.1 era). Wulfgard opens the fight on purpose: on a clean enemy his final shot leaves Heat Infliction, but with an active reaction he would consume it instead of marking — that is why he fires before Perlica electrifies anything. 3.5/5 damage and 2/5 difficulty: the comfort of two Arts Infliction batteries feeding the Combo from Rossi and a stair-step close into the Corrosion.
アプリ内 2手順のローテーション · 2装備ビルド · 長所3 / 短所2 · 注意点2 · 相性メモ1 · 動画解説
Zn0nym0us - Rossi Tackle Noob (the friendly speedrun)
Perlica · Gilberta · Akekuri; difficulty 2/5 — 5/5 damage: everything into the Ultimate from Rossi
Low (2/5 from the author; damage 5/5) Boss speedrun (0 Ultimate at the start)
Zn0nym0us - Rossi Tackle Noob (the friendly speedrun)
Perlica · Gilberta · Akekuri; difficulty 2/5 — 5/5 damage: everything into the Ultimate from Rossi
«The boss will never see what hit them» (1.1 era). The first of the two speedrun teams of the video: the whole design pushes damage into the Ultimate from Rossi. Perlica adds an extra Battle Skill per lap to fatten the Combo from Rossi, Akekuri cashes every Stagger with her Combo, and the burst serves Corrosion and Link right before the close. 5/5 damage from the author with a rotation «very newbie friendly»: 2/5.
アプリ内 2手順のローテーション · 2装備ビルド · 長所3 / 短所2 · 注意点2 · 相性メモ2 · 動画解説
Zn0nym0us - Rossi with Alesh: crystal and Solidification
Endministrator · Alesh · Perlica; difficulty 4/5 — two clocks: the gap Crush and the Solidification
High (4/5 from the author; damage 3/5) Boss / Endgame (0 Ultimate at the start)
Zn0nym0us - Rossi with Alesh: crystal and Solidification
Endministrator · Alesh · Perlica; difficulty 4/5 — two clocks: the gap Crush and the Solidification
The most demanding sheet of the video (1.1 era): the crystal lap of the Endministrator with Alesh as the angler. Every shattered crystal triggers his Combo — his kit trigger is the consumption of reactions and crystals — and in the burst his Ultimate seeds Cryo Infliction so his Battle Skill turns it into forcible Solidification. 3/5 damage and 4/5 difficulty: the author charges in timing what the sheet pays in system.

アプリ内 2手順のローテーション · 2装備ビルド · 長所3 / 短所3 · 注意点3 · 相性メモ1 · 動画解説
Zn0nym0us - Rossi with the Endministrator and Gilberta (the two houses)
Endministrator · Perlica · Gilberta; difficulty 2.5/5 — the crystal lap inside the electric factory
Medium-low (2.5/5 from the author; damage 4/5) Boss / Endgame (0 Ultimate at the start)
Zn0nym0us - Rossi with the Endministrator and Gilberta (the two houses)
Endministrator · Perlica · Gilberta; difficulty 2.5/5 — the crystal lap inside the electric factory
«This will combine all the Endministrator rotation and the normal Perlica with Gilberta rotation» (1.1 era). The two houses of the tab in a single lap: the crystal and its Crush on one side, the Electrification that triggers the Combo from Gilberta on the other. The new rule is bookkeeping: the Crush goes before the second sequence from Rossi AND before the Combo from Gilberta, so the count returns to 4 Vulnerability stacks on every lap. 4/5 damage, 2.5/5 difficulty.
アプリ内 2手順のローテーション · 2装備ビルド · 長所3 / 短所3 · 注意点2 · 相性メモ2 · 動画解説
YZ-月咒 - Nature superwheelchair (INT, formulaic)
The same combo start to finish: 2 charge axes + 1 burst
Low
YZ-月咒 - Nature superwheelchair (INT, formulaic)
The same combo start to finish: 2 charge axes + 1 burst
INT-form Arcane main-C with Tangtang, Xaihi and Perlica: a formulaic combo repeated start to finish (wheelchair). The 4th slot is Perlica — the author's pick over Gilberta: slightly more damage, simpler, and her Stanza ultimate does raise Arcane's ATK (Perlica is Electric, a different element).
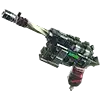
アプリ内 4手順のローテーション · 4装備ビルド · 長所4 / 短所3 · 注意点3 · 相性メモ1 · 動画解説
YZ-月咒 - Electric double-ult (Gilberta)
Gilberta with Stanza casts TWO ultimates inside Zhuang Fangyi's ultimate window
Mid
YZ-月咒 - Electric double-ult (Gilberta)
Gilberta with Stanza casts TWO ultimates inside Zhuang Fangyi's ultimate window
Zhuang Fangyi carries with a closed Electric loop; Gilberta, Arclight and Perlica feed Electric Infliction and Electrification. The hook: Gilberta, holding Stanza of Memorials (no Delivery Guaranteed needed), fits two ultimates inside Zhuang Fangyi's 25s ultimate window (double-ult) — being Nature while Zhuang Fangyi is Electric, the cross-element Stanza ATK bonus reaches the carry. YZ recommends it for its fast hot start; the cold start is also quick since Gilberta spends no battle skill.

アプリ内 3手順のローテーション · 4装備ビルド · 長所4 / 短所4 · 注意点3 · 相性メモ2 · 動画解説
YZ-月咒 - Electric 庄佩弧安 (Antal)
Antal brings susceptibility, amp and an extra electric stack; cold and hot start
High
YZ-月咒 - Electric 庄佩弧安 (Antal)
Antal brings susceptibility, amp and an extra electric stack; cold and hot start
Zhuang Fangyi + Perlica + Arclight + Antal (庄佩弧安). Antal is the reason for the team: his battle skill applies a 60s Electric and Heat susceptibility, his ultimate gives the team Electric and Heat amp, his Detonation Unit weapon adds Arts DMG Taken and the Eternal Xiranite set gives the REST of the team DMG Dealt +16% every time he applies Amp or Susceptible, which is exactly what his ultimate and his battle skill do; on top of that her combo drops an extra Electric Infliction stack that makes Zhuang Fangyi's Electrification worth more. Same closed loop; swapping Antal for any other teammate barely changes the play.
アプリ内 3手順のローテーション · 3装備ビルド · 長所3 / 短所3 · 注意点3 · 相性メモ2 · 動画解説
YZ-月咒 - Electric with Liino 2.0 (Arcane, WILL form)
Liino · Arcane · Perlica; reworked cold start, stable even when interrupted
Medium
YZ-月咒 - Electric with Liino 2.0 (Arcane, WILL form)
Liino · Arcane · Perlica; reworked cold start, stable even when interrupted
Zhuang Fangyi + Liino + Arcane + Perlica, in the author's own 2.0 version. The 1.0 start came from the previous game version, and with Liino on the team it lost stability: interrupt the basic attack often enough and the axis scrambled. This execution reorders the cold start so that no longer happens, and it also removes the most awkward part of 1.0: you no longer watch the cooldown of the Combo from Liino. Per the author, it is simpler to execute and better suited to daily use.
アプリ内 3手順のローテーション · 4装備ビルド · 長所4 / 短所4 · 注意点5 · 相性メモ2 · 動画解説
YZ-月咒 - Electric with Liino (Arclight)
Liino · Arclight · Perlica; a three-lap baby axis and an advanced axis
Low (the advanced axis asks more)
YZ-月咒 - Electric with Liino (Arclight)
Liino · Arclight · Perlica; a three-lap baby axis and an advanced axis
Zhuang Fangyi + Liino + Arclight + Perlica: the 电弧体系, the sibling of the Arcane version. The author repeats his verdict — the damage gap between the two versions is not large and you choose by comfort — and delivers what he previewed in that team's 2.0: with Arclight the flow runs with SP to spare. The video teaches two executions: a baby axis, meant to be learned in minutes with very comfortable charge, and an advanced axis that eats every team buff and aims at the damage ceiling.
アプリ内 2手順のローテーション · 1種のローテーション派生 · 4装備ビルド · 長所4 / 短所4 · 注意点5 · 相性メモ1 · 動画解説
YZ-月咒 - Electric with Arcane, no Liino (baby axis)
Arcane · Arclight · Perlica; a two-lap baby axis and the standard start with the slab
Low (baby axis); medium (standard start)
YZ-月咒 - Electric with Arcane, no Liino (baby axis)
Arcane · Arclight · Perlica; a two-lap baby axis and the standard start with the slab
Zhuang Fangyi + Arcane + Arclight + Perlica: the author's first version with Arcane in the Electric team, before Liino (he says in the description that the standard version with Liino would come later). Four changes from the previous team: the start is faster (a low-potential Zhuang Fangyi with the LYNX Slab needs 4 Battle Skills instead of 5 to fill her Ultimate), the damage environment improves with the 6s slow motion of the Combo from Arcane, the burst still hangs level 4 Electrification, and the Battle Skill from Perlica plus the Combo from Arcane hang layers in an area, so against groups the start saves SP. The video brings two executions: the baby axis (two identical laps and burst) and the standard start with the LYNX Slab.
アプリ内 2手順のローテーション · 1種のローテーション派生 · 4装備ビルド · 長所4 / 短所4 · 注意点6 · 相性メモ2 · 動画解説
Zn0nym0us - The most consistent ZF (Arclight and Alesh)
Arclight · Alesh · Perlica; difficulty 2.5/5 — the most reliable 0-0 loop for the normal rotation
Medium-low (2.5/5 from the author; damage 4/5)
Zn0nym0us - The most consistent ZF (Arclight and Alesh)
Arclight · Alesh · Perlica; difficulty 2.5/5 — the most reliable 0-0 loop for the normal rotation
«Probably the most consistent team for the normal rotation with Zhuang Fangyi» (1.2 guide, before Liino). The whole kit of ZF consumes Electric Infliction and Electrification to scale her damage and charge a 240 Ultimate — and this quartet pays for it cold, with no starting Ultimate. The video also kills a myth: the Battle Skill from Arclight IS used, even though it consumes the Electrification, because the Ultimate arrives anyway and her talent returns 50-60% Electric DMG to the team. 4/5 damage, 2.5/5 difficulty.
アプリ内 3手順のローテーション · 4装備ビルド · 長所3 / 短所2 · 注意点2 · 相性メモ1 · 動画解説
Zn0nym0us - ZF with Akekuri (SP for the Ultimate)
Arclight · Akekuri · Perlica; difficulty 2.5/5 — the Flares pay for the transformation
Medium-low (2.5/5 from the author; damage 3.5/5)
Zn0nym0us - ZF with Akekuri (SP for the Ultimate)
Arclight · Akekuri · Perlica; difficulty 2.5/5 — the Flares pay for the transformation
The SP budget variant (1.2 guide, before Liino): the same lap as the consistent ZF, with Akekuri in the Alesh seat. It loses a bit of damage — 3.5/5 against 4/5 — but her Flare Ultimate refills the SP during the transformation, right where ZF devours it the most. The two new rules: wait until there are nine Sunderblades on the ground before the Ultimate from Akekuri, and do not let the SP hit the cap during the transformation.
アプリ内 2手順のローテーション · 4装備ビルド · 長所3 / 短所2 · 注意点2 · 相性メモ1 · 動画解説
Zn0nym0us - ZF with SP to spare (Alesh and Akekuri)
Alesh · Akekuri · Perlica; difficulty 2/5 — no Arclight, with a reserve for cancelling attacks
Low (2/5 from the author; damage 3/5)
Zn0nym0us - ZF with SP to spare (Alesh and Akekuri)
Alesh · Akekuri · Perlica; difficulty 2/5 — no Arclight, with a reserve for cancelling attacks
The only team of the video without Arclight (1.2 guide, before Liino): «the rotation is quite simple». Alesh inherits the Thermite Cutter, Akekuri brings the Flares, and the new rule is about formation: Perlica goes BEFORE ZF in the team order, so her Combo fires first and the Electrification is already set when the Array from ZF converts. 3/5 damage with 2/5 difficulty — and so much reserve SP that you can spend it cancelling enemy attacks.
アプリ内 2手順のローテーション · 2装備ビルド · 長所3 / 短所2 · 注意点3 · 相性メモ1 · 動画解説
Maygi - Arcane · Perlica · Gilberta
Arcane (WILL) · Perlica · Gilberta
Medium Boss / Single-target
Maygi - Arcane · Perlica · Gilberta
Arcane (WILL) · Perlica · Gilberta
The guide's reference team and the highest overall performer on a single target: Arcane gifts a Nature Infliction stack with her Combo and with her Ultimate, Perlica sets the loop tempo with her Combo, and Gilberta charges so fast she fits two Ultimates per rotation. A 57-second rotation, calculated at 71K team DPS with BIS weapons.

アプリ内 4手順のローテーション · 2種のローテーション派生 · 4装備ビルド · 長所4 / 短所4 · 注意点5 · 相性メモ4 · 動画解説
Maygi - No Gilberta: Fluorite
Arcane (WILL) · Fluorite · Perlica
Medium Boss / Single-target
Maygi - No Gilberta: Fluorite
Arcane (WILL) · Fluorite · Perlica
The same rotation concept when you do not have Gilberta: Fluorite takes her seat and provides 3 free Nature Inflictions per rotation (against Gilberta's 2) at the cost of buffing nobody. A 55-second rotation and 56K team DPS. If you do not have Arcane either, the team with Antal as the "Arcane at home" has its own guide.

アプリ内 3手順のローテーション · 1種のローテーション派生 · 4装備ビルド · 長所4 / 短所4 · 注意点3 · 相性メモ3 · 動画解説
Maygi - NO Arcane, no Gilberta: Antal
Antal · Fluorite · Perlica (no other 6-star)
Medium Boss / Single-target
Maygi - NO Arcane, no Gilberta: Antal
Antal · Fluorite · Perlica (no other 6-star)
The team for those who have neither Arcane nor Gilberta: no other 6-star operator. Antal plays "Arcane at home" with Detonation Unit and the Qingbo set, duplicating with his Combo the Nature Infliction Fluorite applies, at the cost of a 100 SP tax. The rotation concept is the same as the rest of the guide's teams; the author warns that without Arcane the results leave a bit to be desired, as her substitutes have little to no buffing.
アプリ内 2手順のローテーション · 2種のローテーション派生 · 4装備ビルド · 長所4 / 短所4 · 注意点4 · 相性メモ3 · 動画解説
YZ-月咒 - Arcane (WILL) · Perlica · Liino
Arcane (WILL) · Perlica · Liino; a 9-arrow cold start and an infinite 5-arrow loop
Medium Boss / Single-target
YZ-月咒 - Arcane (WILL) · Perlica · Liino
Arcane (WILL) · Perlica · Liino; a 9-arrow cold start and an infinite 5-arrow loop
The popular Typhoeus team according to the author: Typhoeus, Arcane in WILL form, Perlica and Liino. Perlica is the swappable seat — with Ardelia the single-target damage is higher and more extreme, but with Perlica there is one Battle Skill less to press, the axis reads simpler and more direct, and that makes it the version for anyone starting to learn the team; the Ardelia one goes in another video. The video focuses on understanding why the loop holds: 'I cast everything and the HP does not move' comes from not having understood Typhoeus. It all reduces to two cycles: the 9-arrow one, which cold-starts the team, and the 5-arrow one, which repeats endlessly.
アプリ内 3手順のローテーション · 2種のローテーション派生 · 4装備ビルド · 長所4 / 短所4 · 注意点6 · 相性メモ2 · 動画解説
YZ-月咒 - Arcane (WILL) · Perlica · Xaihi
Arcane (WILL) · Perlica · Xaihi; no Gilberta, no Liino: one charge lap and one burst lap
Low (formulaic axis, per the author) Boss / Single-target
YZ-月咒 - Arcane (WILL) · Perlica · Xaihi
Arcane (WILL) · Perlica · Xaihi; no Gilberta, no Liino: one charge lap and one burst lap
The Typhoeus team without Gilberta or Liino: Arcane in WILL form, Perlica and Xaihi in seats 3 and 4, and Perlica can be swapped for Fluorite with the same plan. The author presents it as a formulaic axis for lazy players: two phases, one charge lap and one burst lap; the first charge lap starts with 9 arrows and every one after it needs only 5, and the author holds it is not behind the teams with Gilberta or Liino. The only thing to manage is the Cryo Infliction left by the Combo from Xaihi, and that is solved by turning it into Corrosion with the Battle Skill from Arcane, which even improves the total damage; it does not ask for fine hands.
アプリ内 2手順のローテーション · 2種のローテーション派生 · 4装備ビルド · 長所5 / 短所5 · 注意点6 · 相性メモ3 · 動画解説
YZ-月咒 - NO Arcane: Purrchena · Perlica · Liino
Purrchena · Perlica · Liino; the 无诀队 (no-Arcane team): three charge laps and one burst lap, five arrows per lap
Low (quick-start guide) Boss / Single-target
YZ-月咒 - NO Arcane: Purrchena · Perlica · Liino
Purrchena · Perlica · Liino; the 无诀队 (no-Arcane team): three charge laps and one burst lap, five arrows per lap
The Typhoeus team for anyone without Arcane (无诀队): Purrchena takes the Nature Infliction seat the team needs no matter what, and Perlica and Liino stay as in the Arcane version. The author presents her as the best Arcane substitute for now: each Nature layer costs her 80 SP, or 60 if her shield blocks a hit, and according to the author she hangs it faster and with less SP than Fluorite, although as a pure applier she stays below Arcane. A 5-arrow axis: three charge laps and one burst lap, and the Combo from Typhoeus is saved to open the next lap, because its Barrage Array leaves 6s of Nature Burst DMG Taken. Purrchena's Combo and Ultimate have no fixed slot; the author also suggests her for high-pressure content, where survival matters.

アプリ内 3手順のローテーション · 1種のローテーション派生 · 4装備ビルド · 長所5 / 短所5 · 注意点5 · 相性メモ2 · 動画解説
终末协约攻略组 - NO Arcane: Purrchena · Perlica · Xaihi
Purrchena · Perlica · Xaihi; the transitional Nature team: Typhoeus on basics and every Combo as soon as it lights
Low (no axis to memorize) General / Survival
终末协约攻略组 - NO Arcane: Purrchena · Perlica · Xaihi
Purrchena · Perlica · Xaihi; the transitional Nature team: Typhoeus on basics and every Combo as soon as it lights
The Typhoeus Nature team for newer players who do not have Arcane yet: Purrchena applies Nature Infliction with the second press of her Battle Skill, Perlica forces Electrification with her Combo and Xaihi fires her Ultimate, which grants Nature Amp. There is no axis to memorize: Typhoeus is controlled with basics and Final Strikes, and every Combo and every Ultimate goes out as soon as it lights. According to the author, the total damage sits somewhat below the usual teams, in exchange for the survivability Purrchena brings. Xaihi's seat accepts Gilberta, Liino or Arcane (WILL).
アプリ内 3手順のローテーション · 4装備ビルド · 長所5 / 短所4 · 注意点4 · 相性メモ2 · 動画解説
Five-star Electric Caster who carries the damage here: her Battle Skill applies Electric Infliction and her Combo, fired by a Final Strike from the controlled operator, forces an Electrification. Her keystones give her ATK every time she applies Electrification (two stacks) and strengthen the Arts DMG Taken of her Combo's Electrification, and her Ultimate is a chunk of orbital debris crashing down with massive Electric damage. With the table set, she lands the one-million non-crit hit that opens Raaay丶's video.
資料
- コードネーム
- ペリカ
- 所属
- エンドフィールド工業
- 種族
- リーベリ
- 性別
- 女
- 誕生日
- 3月16日
- 声優
- 陈婷婷 (CN) · Jane Jackson (EN) · 若山詩音 (JP) · 유혜지 (KR)
総合体力検査
- 物理強度標準
- 戦闘技術標準
- 戦術立案卓越
- アーツ適性優秀
メディカルチェックの結果、非感染者に認定。
資料を読む 2件
ペリカはエンドフィールドの監察官で、エンドフィールドの公式発言者の1人である。主に協約源石技術の開発および応用の管理と推進を担当している。同時に、帝江号の管理業務も担う。 「彼女が『監察官』に相応しい人物であるかという疑問の声を、しばらく耳にしていません。彼女は実績をもってあらゆる疑念を払い、同時に『ペリカがいたからこの役職が生まれた、順番を間違えるな』と語ったM3の言葉を証明しました。これほど若い監察官がエンドフィールド全体の管理を担うなど、俄には信じ難いと私も思っていました。ですが、彼女の指揮の下、エンドフィールドが目指す未来は以前よりも明確になってきたのです。」 「とはいえ、すべてが順調というわけではありません。たとえば、危機対策班の管理という要職にありながら、いつまでも隊員と共に前線へ出続けるべきではありません。彼女が私の申請を却下し続けたとしても、リスクの再評価については今後も検討いただくよう促していくつもりです。」 ――エンドフィールド人事アシスタント マーティン・マーヴィン・マーレン
エンドフィールドのオペレーターには、幼少期に災害を生き延びたという者は少なくない。ペリカ監察官もそのうちの1人であり、同じように家を失った子どもたちと共に、管理人とエンドフィールドによって保護された。成長と学びを重ねる中で、協約技術に強い関心を示すようになった彼女は、タロⅡにおけるエンドフィールドの基本業務にも徐々に関わるようになっていく。そして2年足らずのうちにその足跡はタロⅡのあらゆる都市に及び、我々が直面してきた脅威に対する彼女の認識は、一般人の理解を遥かに超えるものとなった。協約技術への情熱は彼女を研究センターへと導き、エンドフィールドが技術開発と応用における大きな飛躍を遂げる原動力となった。その後、然るべくして「監察官」に任命され、タロⅡの静止軌道に悠然と浮かぶ巨大な「帝江号」の舵取りを担う存在となった。 【権限記録】 ペリカの過去は、公開されている記録のようにいつも恵まれていたわけじゃない。 10数年前、君は遠征でペリカを救って、心細さと戸惑いの中にあった彼女の支えになった。でもすぐ次の遠征で、彼女の人生がまた変わることになるなんて、誰も予想できなかった……君を失うなんてね。それから、同じ時期に君が救った子たちはほとんどが新しい生活を始めた。姉妹のように親しかったレシアも帝江号を離れ、別々の道を歩むことになったんだ。 側にいた友人が1人、また1人と旅立っていくたびに、ペリカにのしかかる責任はどんどん重くなっていった。協約技術の研究も、何度も行き詰まって…… それでも変わらずに、一番険しい道を歩き続けてきたんだ。その姿には本当に感服したよ。もちろん、ここまで来られたのは多くの人の助けがあったからだ。でも、彼女が積み重ねてきた努力と、耐え忍んだ苦労を……私は誰よりも知っている。 彼女と話してくるといい。もう、随分待たされただろうからね。 ――M3の音声備忘録