Perlica
 Electric Caster 5★ Buffer Support tier S+ Difficulty: Low Endfield Industries
 Verdict
Universal enabler: triggers the Combo of nearly any Arts carry (ignoring existing Inflictions), forces SP-free Electrification and staggers reliably. Her Electrification applies Arts DMG Taken, a rare separate multiplier that amplifies the whole team. She fits ~90% of comps and can also sub-DPS.
From the EndSync tier index — how placements are decided.
Loadout
What the curated team guides actually equip on Perlica, counted across every comp they appear in. The denominator is always shown — nothing here is a rounded percentage.
Weapon
9/23 builds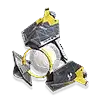
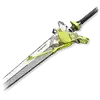
Wild Wanderer 5★ Arts Unit
ATK 411 · Intellect: +124 · Electric DMG Bonus: +34.70%
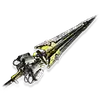
Arts Intensity: +28. After the wielder applies Electrification, the team gains Physical DMG dealt and Electric DMG dealt +22.4% for 15s. Effects of the same name cannot stack.
Also seen
-

Stanza of Memorials 5★ Arts Unit
ATK 411 · Intellect: +124 · Attack: +31.20%
8/23 builds
-
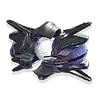
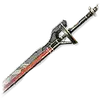
Oblivion 6★ Arts Unit
ATK 495 · Intellect: +156 · Arts DMG Bonus: +43.30%
5/23 builds
-

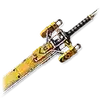
Detonation Unit 6★ Arts Unit
ATK 490 · Main Attribute: +132 · Arts Intensity: +78
1/23 builds
Gear
10/26 builds
Pulser Labs Disruptor Suit
Arts Intensity: +26

Eternal Xiranite Gloves T1
Ultimate Gain Efficiency: +26.7%

Pulser Labs Calibrator
Arts Intensity: +53
Pulser Labs Calibrator
Arts Intensity: +53
3pc Pulser Labs — the 3-piece set bonus is active.
The Pulser Labs set shows up in 15 of 26 builds; this exact four-piece combination in 10. Pieces from different builds are never mixed — this is a build someone actually recommends.
The curated pick, assuming full investment. It ignores what is popular and answers a different question: what is the ceiling for this operator.
Best-in-slot weapon
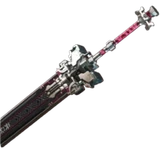
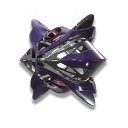
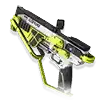
Detonation Unit 6★ Arts Unit
ATK 490 · Main Attribute: +132 · Arts Intensity: +78
Sec. Attribute: +16%. After the wielder applies an Arts Burst, target enemy suffers Arts DMG taken +14.4% for 15s. Effects of the same name cannot stack.
Support alternatives
-
Oblivion 6★ Arts Unit
ATK 495 · Intellect: +156 · Arts DMG Bonus: +43.30%
-
Wild Wanderer 5★ Arts Unit
ATK 411 · Intellect: +124 · Electric DMG Bonus: +34.70%
Recommended gear
Pulser Labs Disruptor Suit
Arts Intensity: +26

Æthertech Gloves
Arts Intensity: +44
Pulser Labs Calibrator
Arts Intensity: +53
Pulser Labs Calibrator
Arts Intensity: +53
3pc Pulser Labs — the 3-piece set bonus is active.
Teams
Perlica appears in 32 of the 72 curated comps — as the carry in 1 of them. They're not ranked against each other — on purpose: pick the one that looks fun to play. Open one to see the pitch and the lineup; the full guide is in the app.
Raaay丶 - Perlica main C (Arcane INT · Arclight · Liino)
Double Electrification for Perlica; Arclight is the SP engine
High (long axis; a simple version exists) Boss / Single-target
Raaay丶 - Perlica main C (Arcane INT · Arclight · Liino)
Double Electrification for Perlica; Arclight is the SP engine
The rotation class for the 诀佩弧梨 quartet (Arcane, Perlica, Arclight and Liino) by the author of the wheelchairs. The upfront warning: the team can be played the simple way, three supports and Arcane INT as the only C with the generic idea of converting two Inflictions into Corrosion, but if you chase the team's ceiling, Perlica and Arclight overturn the impression most players have of them and take the total damage and the axis to another dimension. Per the author's tests it is, among all the teams built around Arcane and Liino as the only six stars, the one with the highest ceiling and the most versatility, and overall it does not fall short of the author's 管诀赛钓 team. In exchange, strength is tied to investment: all four operators need raising, like the Perlica opening the video with a one-million non-crit hit.






In the app 6-step rotation · 2 rotation variants · 4 gear builds · 4 pros / 4 cons · 6 pitfalls · 3 matchup notes · video walkthrough
Maygi — Rossi Hybrid
Mi Fu · Rossi · Gilberta · Perlica
High CC / Mobs & Elites
Maygi — Rossi Hybrid
Mi Fu · Rossi · Gilberta · Perlica
The fastest hybrid. Here Rossi is NOT the carry: she's played as a Vulnerability battery (3 stacks in one Combo+skill) for Mi Fu to consume. Gilberta and Perlica are one of the only sources of a free starting Vulnerability stack.





In the app 3-step rotation · 4 gear builds · 3 pros / 3 cons · 4 pitfalls · 1 matchup note · video walkthrough
Maygi - Full Electric
Arclight · Perlica · Antal
High Boss / Single-target
Maygi - Full Electric
Arclight · Perlica · Antal
The benchmark Electric single-target team: stack lances on the field and recall them all at once with every buff stacked.


In the app 2-step rotation · 1 rotation variant · 4 gear builds · 4 pros / 4 cons · 4 pitfalls · 3 matchup notes · video walkthrough
Electric + Corrosion
Perlica · Antal · Gilberta
High Flexible / AoE + Boss
Electric + Corrosion
Perlica · Antal · Gilberta
Gilberta comes in for Arclight and converts the Electric Infliction into Corrosion. The burst is the highest of the three teams, but her field lasts 5 s, so the timing is strict.
In the app 3-step rotation · 4 gear builds · 4 pros / 4 cons · 4 pitfalls · 2 matchup notes · video walkthrough
Comfort / Link
Akekuri · Perlica · Gilberta
Medium AoE / Comfort
Comfort / Link
Akekuri · Perlica · Gilberta
The comfortable version with Akekuri: her Link powers the recall with no stack timing. Lower ceiling, much easier to play.

In the app 2-step rotation · 4 gear builds · 4 pros / 4 cons · 4 pitfalls · 2 matchup notes · video walkthrough
Maygi - Cryo Perlica
Xaihi · Gilberta · Perlica
High Boss / Single-target
Maygi - Cryo Perlica
Xaihi · Gilberta · Perlica
Cryo hyper-carry: the team feeds her Inflictions and she cashes it all into a 220-cost Ultimate that unloads a hail of bullets.


In the app 4-step rotation · 1 rotation variant · 4 gear builds · 4 pros / 4 cons · 5 pitfalls · 6 matchup notes · video walkthrough
Zn0nym0us - Yvonne without Gilberta (Perlica and Ardelia)
Perlica · Ardelia · Xaihi; 4.5/5 — high F2P damage on the 90% timing of the Combo from Perlica
High (4.5/5 from the author) Boss / Endgame (no pre-fight prep)
Zn0nym0us - Yvonne without Gilberta (Perlica and Ardelia)
Perlica · Ardelia · Xaihi; 4.5/5 — high F2P damage on the 90% timing of the Combo from Perlica
The team for whoever lacks Gilberta (1.0-1.1 era): Ardelia takes the seat with her Combo Corrosion, her Physical Susceptibility and the Ultimate healing — without fixing the SP hunger, and with an exclusion rule the author makes plain: Ardelia and Gilberta together, NO — the Vulnerability from the Combo of Gilberta stops the one from Ardelia from firing. High damage and sustain in exchange for the finest timing in the guide short of the 5/5: the Combo from Perlica gets clocked at 90% of its cooldown.

In the app 2-step rotation · 3 pros / 3 cons · 3 pitfalls · 1 matchup note · video walkthrough
Maygi - Arts (Antal)
Perlica · Gilberta · Antal
High Boss / Single-target
Maygi - Arts (Antal)
Perlica · Gilberta · Antal
Rossi's highest-DPS Arts team: everything is built to squeeze her 27-hit Heat Ultimate.
In the app 3-step rotation · 1 rotation variant · 4 gear builds · 5 pros / 4 cons · 5 pitfalls · 3 matchup notes · video walkthrough
Zn0nym0us - The easiest Rossi (F2P, no Gilberta)
Akekuri · Wulfgard · Perlica; damage 4/5 at difficulty 1/5, on the scale of the author himself
Very low (1/5 from the author; damage 4/5) Boss / Endgame (0 Ultimate at the start)
Zn0nym0us - The easiest Rossi (F2P, no Gilberta)
Akekuri · Wulfgard · Perlica; damage 4/5 at difficulty 1/5, on the scale of the author himself
First team of the «Gilberta-less and F2P» guide from Zn0nym0us (1.1 era): after the wave of players without Gilberta who could not run his original 13 teams, he spent days testing Gilberta-free lineups and this one stayed as the star recommendation for anyone starting out — «this might be the easiest Rossi team to play», with no complicated timings and high damage all the same. His whole series uses repeatable rotations from 0 Ultimate energy, built for the endgame where you are not allowed to start charged. The showcase runs a level 1 Eminent Repute on Rossi, on purpose: the sequence is what you copy.

In the app 2-step rotation · 1 gear builds · 4 pros / 3 cons · 3 pitfalls · 2 matchup notes · video walkthrough
Zn0nym0us - Premium Rossi with Tangtang (team damage)
Tangtang · Gilberta · Perlica; 5/5 TEAM damage — two limiteds and the early wave of the OLDEN STARE
Medium (3/5 from the author; team damage 5/5) Boss / Endgame (0 Ultimate at the start)
Zn0nym0us - Premium Rossi with Tangtang (team damage)
Tangtang · Gilberta · Perlica; 5/5 TEAM damage — two limiteds and the early wave of the OLDEN STARE
The most premium team of the 13-team guide from Zn0nym0us (1.1 era), honest nuance included: it is not the best PERSONAL damage for Rossi, but it is «one of the highest team damages in the game» for her. Tangtang brings Susceptibility, extra DPS and her lockdown — useful against specific boss mechanics. The whole series runs from 0 Ultimate with the showcase on a level 1 weapon.

In the app 3-step rotation · 1 gear builds · 3 pros / 3 cons · 3 pitfalls · 2 matchup notes · video walkthrough
Zn0nym0us - Rossi with Pogranichnik (the best personal damage)
Pogranichnik · Gilberta · Perlica; 5/5 with Breach all fight — and the final Breach after the Ultimate, for the snapshot
Medium (3/5 from the author; damage 5/5) Boss / Endgame (0 Ultimate at the start)
Zn0nym0us - Rossi with Pogranichnik (the best personal damage)
Pogranichnik · Gilberta · Perlica; 5/5 with Breach all fight — and the final Breach after the Ultimate, for the snapshot
«The best personal damage team for Rossi» of the 13-team guide (1.1 era): the Breach from Pogranichnik raises physical damage taken across the WHOLE fight — not only the burst — and feeds the basic, the Battle Skill, the Combo and the first talent from Rossi at once. A single rotation serves as opening and loop, and the author scores it 5/5 damage at 3/5 difficulty: «very simple».

In the app 2-step rotation · 1 gear builds · 3 pros / 3 cons · 2 pitfalls · 2 matchup notes · video walkthrough
Zn0nym0us - F2P Rossi with the crystal of the Endministrator
Endministrator · Wulfgard · Perlica; the crystal broken between sequences and two free stacks to reset
Medium (3/5 from the author; damage 4/5) Boss / Endgame (0 Ultimate at the start)
Zn0nym0us - F2P Rossi with the crystal of the Endministrator
Endministrator · Wulfgard · Perlica; the crystal broken between sequences and two free stacks to reset
The team «you can build entirely for free» of the 13-team guide (1.1 era): Endministrator, Wulfgard and Perlica around Rossi, with both house technical rules together — the Battle Skill from Wulfgard BEFORE the electric Combo (or his Heat consumes the Electrification leaving no Infliction) and the Crush from the Endministrator on his crystal BETWEEN the two sequences of the Combo from Rossi, returning «two free stacks to reset the rotation». 4/5 damage at 3/5 difficulty.

In the app 3-step rotation · 1 gear builds · 3 pros / 2 cons · 2 pitfalls · 1 matchup note · video walkthrough
Zn0nym0us - The most requested Rossi (Wulfgard, Perlica and Gilberta)
Wulfgard · Perlica · Gilberta; difficulty 2/5 — the one the community asked for, with the Wulfgard-first rule
Low (2/5 from the author; damage 3.5/5) Boss / Endgame (0 Ultimate at the start)
Zn0nym0us - The most requested Rossi (Wulfgard, Perlica and Gilberta)
Wulfgard · Perlica · Gilberta; difficulty 2/5 — the one the community asked for, with the Wulfgard-first rule
«One of the most asked team comps I have seen through the community» (1.1 era). Wulfgard opens the fight on purpose: on a clean enemy his final shot leaves Heat Infliction, but with an active reaction he would consume it instead of marking — that is why he fires before Perlica electrifies anything. 3.5/5 damage and 2/5 difficulty: the comfort of two Arts Infliction batteries feeding the Combo from Rossi and a stair-step close into the Corrosion.
In the app 2-step rotation · 2 gear builds · 3 pros / 2 cons · 2 pitfalls · 1 matchup note · video walkthrough
Zn0nym0us - Rossi Tackle Noob (the friendly speedrun)
Perlica · Gilberta · Akekuri; difficulty 2/5 — 5/5 damage: everything into the Ultimate from Rossi
Low (2/5 from the author; damage 5/5) Boss speedrun (0 Ultimate at the start)
Zn0nym0us - Rossi Tackle Noob (the friendly speedrun)
Perlica · Gilberta · Akekuri; difficulty 2/5 — 5/5 damage: everything into the Ultimate from Rossi
«The boss will never see what hit them» (1.1 era). The first of the two speedrun teams of the video: the whole design pushes damage into the Ultimate from Rossi. Perlica adds an extra Battle Skill per lap to fatten the Combo from Rossi, Akekuri cashes every Stagger with her Combo, and the burst serves Corrosion and Link right before the close. 5/5 damage from the author with a rotation «very newbie friendly»: 2/5.
In the app 2-step rotation · 2 gear builds · 3 pros / 2 cons · 2 pitfalls · 2 matchup notes · video walkthrough
Zn0nym0us - Rossi with Alesh: crystal and Solidification
Endministrator · Alesh · Perlica; difficulty 4/5 — two clocks: the gap Crush and the Solidification
High (4/5 from the author; damage 3/5) Boss / Endgame (0 Ultimate at the start)
Zn0nym0us - Rossi with Alesh: crystal and Solidification
Endministrator · Alesh · Perlica; difficulty 4/5 — two clocks: the gap Crush and the Solidification
The most demanding sheet of the video (1.1 era): the crystal lap of the Endministrator with Alesh as the angler. Every shattered crystal triggers his Combo — his kit trigger is the consumption of reactions and crystals — and in the burst his Ultimate seeds Cryo Infliction so his Battle Skill turns it into forcible Solidification. 3/5 damage and 4/5 difficulty: the author charges in timing what the sheet pays in system.

In the app 2-step rotation · 2 gear builds · 3 pros / 3 cons · 3 pitfalls · 1 matchup note · video walkthrough
Zn0nym0us - Rossi with the Endministrator and Gilberta (the two houses)
Endministrator · Perlica · Gilberta; difficulty 2.5/5 — the crystal lap inside the electric factory
Medium-low (2.5/5 from the author; damage 4/5) Boss / Endgame (0 Ultimate at the start)
Zn0nym0us - Rossi with the Endministrator and Gilberta (the two houses)
Endministrator · Perlica · Gilberta; difficulty 2.5/5 — the crystal lap inside the electric factory
«This will combine all the Endministrator rotation and the normal Perlica with Gilberta rotation» (1.1 era). The two houses of the tab in a single lap: the crystal and its Crush on one side, the Electrification that triggers the Combo from Gilberta on the other. The new rule is bookkeeping: the Crush goes before the second sequence from Rossi AND before the Combo from Gilberta, so the count returns to 4 Vulnerability stacks on every lap. 4/5 damage, 2.5/5 difficulty.
In the app 2-step rotation · 2 gear builds · 3 pros / 3 cons · 2 pitfalls · 2 matchup notes · video walkthrough
YZ-月咒 - Nature superwheelchair (INT, formulaic)
The same combo start to finish: 2 charge axes + 1 burst
Low
YZ-月咒 - Nature superwheelchair (INT, formulaic)
The same combo start to finish: 2 charge axes + 1 burst
INT-form Arcane main-C with Tangtang, Xaihi and Perlica: a formulaic combo repeated start to finish (wheelchair). The 4th slot is Perlica — the author's pick over Gilberta: slightly more damage, simpler, and her Stanza ultimate does raise Arcane's ATK (Perlica is Electric, a different element).
In the app 4-step rotation · 4 gear builds · 4 pros / 3 cons · 3 pitfalls · 1 matchup note · video walkthrough
YZ-月咒 - Electric double-ult (Gilberta)
Gilberta with Stanza casts TWO ultimates inside Zhuang Fangyi's ultimate window
Mid
YZ-月咒 - Electric double-ult (Gilberta)
Gilberta with Stanza casts TWO ultimates inside Zhuang Fangyi's ultimate window
Zhuang Fangyi carries with a closed Electric loop; Gilberta, Arclight and Perlica feed Electric Infliction and Electrification. The hook: Gilberta, holding Stanza of Memorials (no Delivery Guaranteed needed), fits two ultimates inside Zhuang Fangyi's 25s ultimate window (double-ult) — being Nature while Zhuang Fangyi is Electric, the cross-element Stanza ATK bonus reaches the carry. YZ recommends it for its fast hot start; the cold start is also quick since Gilberta spends no battle skill.

In the app 3-step rotation · 4 gear builds · 4 pros / 4 cons · 3 pitfalls · 2 matchup notes · video walkthrough
YZ-月咒 - Electric 庄佩弧安 (Antal)
Antal brings susceptibility, amp and an extra electric stack; cold and hot start
High
YZ-月咒 - Electric 庄佩弧安 (Antal)
Antal brings susceptibility, amp and an extra electric stack; cold and hot start
Zhuang Fangyi + Perlica + Arclight + Antal (庄佩弧安). Antal is the reason for the team: his battle skill applies a 60s Electric and Heat susceptibility, his ultimate gives the team Electric and Heat amp, his Detonation Unit weapon adds Arts DMG Taken and the Eternal Xiranite set gives the REST of the team DMG Dealt +16% every time he applies Amp or Susceptible, which is exactly what his ultimate and his battle skill do; on top of that her combo drops an extra Electric Infliction stack that makes Zhuang Fangyi's Electrification worth more. Same closed loop; swapping Antal for any other teammate barely changes the play.
In the app 3-step rotation · 3 gear builds · 3 pros / 3 cons · 3 pitfalls · 2 matchup notes · video walkthrough
YZ-月咒 - Electric with Liino 2.0 (Arcane, WILL form)
Liino · Arcane · Perlica; reworked cold start, stable even when interrupted
Medium
YZ-月咒 - Electric with Liino 2.0 (Arcane, WILL form)
Liino · Arcane · Perlica; reworked cold start, stable even when interrupted
Zhuang Fangyi + Liino + Arcane + Perlica, in the author's own 2.0 version. The 1.0 start came from the previous game version, and with Liino on the team it lost stability: interrupt the basic attack often enough and the axis scrambled. This execution reorders the cold start so that no longer happens, and it also removes the most awkward part of 1.0: you no longer watch the cooldown of the Combo from Liino. Per the author, it is simpler to execute and better suited to daily use.
In the app 3-step rotation · 4 gear builds · 4 pros / 4 cons · 5 pitfalls · 2 matchup notes · video walkthrough
YZ-月咒 - Electric with Liino (Arclight)
Liino · Arclight · Perlica; a three-lap baby axis and an advanced axis
Low (the advanced axis asks more)
YZ-月咒 - Electric with Liino (Arclight)
Liino · Arclight · Perlica; a three-lap baby axis and an advanced axis
Zhuang Fangyi + Liino + Arclight + Perlica: the 电弧体系, the sibling of the Arcane version. The author repeats his verdict — the damage gap between the two versions is not large and you choose by comfort — and delivers what he previewed in that team's 2.0: with Arclight the flow runs with SP to spare. The video teaches two executions: a baby axis, meant to be learned in minutes with very comfortable charge, and an advanced axis that eats every team buff and aims at the damage ceiling.
In the app 2-step rotation · 1 rotation variant · 4 gear builds · 4 pros / 4 cons · 5 pitfalls · 1 matchup note · video walkthrough
YZ-月咒 - Electric with Arcane, no Liino (baby axis)
Arcane · Arclight · Perlica; a two-lap baby axis and the standard start with the slab
Low (baby axis); medium (standard start)
YZ-月咒 - Electric with Arcane, no Liino (baby axis)
Arcane · Arclight · Perlica; a two-lap baby axis and the standard start with the slab
Zhuang Fangyi + Arcane + Arclight + Perlica: the author's first version with Arcane in the Electric team, before Liino (he says in the description that the standard version with Liino would come later). Four changes from the previous team: the start is faster (a low-potential Zhuang Fangyi with the LYNX Slab needs 4 Battle Skills instead of 5 to fill her Ultimate), the damage environment improves with the 6s slow motion of the Combo from Arcane, the burst still hangs level 4 Electrification, and the Battle Skill from Perlica plus the Combo from Arcane hang layers in an area, so against groups the start saves SP. The video brings two executions: the baby axis (two identical laps and burst) and the standard start with the LYNX Slab.
In the app 2-step rotation · 1 rotation variant · 4 gear builds · 4 pros / 4 cons · 6 pitfalls · 2 matchup notes · video walkthrough
Zn0nym0us - The most consistent ZF (Arclight and Alesh)
Arclight · Alesh · Perlica; difficulty 2.5/5 — the most reliable 0-0 loop for the normal rotation
Medium-low (2.5/5 from the author; damage 4/5)
Zn0nym0us - The most consistent ZF (Arclight and Alesh)
Arclight · Alesh · Perlica; difficulty 2.5/5 — the most reliable 0-0 loop for the normal rotation
«Probably the most consistent team for the normal rotation with Zhuang Fangyi» (1.2 guide, before Liino). The whole kit of ZF consumes Electric Infliction and Electrification to scale her damage and charge a 240 Ultimate — and this quartet pays for it cold, with no starting Ultimate. The video also kills a myth: the Battle Skill from Arclight IS used, even though it consumes the Electrification, because the Ultimate arrives anyway and her talent returns 50-60% Electric DMG to the team. 4/5 damage, 2.5/5 difficulty.
In the app 3-step rotation · 4 gear builds · 3 pros / 2 cons · 2 pitfalls · 1 matchup note · video walkthrough
Zn0nym0us - ZF with Akekuri (SP for the Ultimate)
Arclight · Akekuri · Perlica; difficulty 2.5/5 — the Flares pay for the transformation
Medium-low (2.5/5 from the author; damage 3.5/5)
Zn0nym0us - ZF with Akekuri (SP for the Ultimate)
Arclight · Akekuri · Perlica; difficulty 2.5/5 — the Flares pay for the transformation
The SP budget variant (1.2 guide, before Liino): the same lap as the consistent ZF, with Akekuri in the Alesh seat. It loses a bit of damage — 3.5/5 against 4/5 — but her Flare Ultimate refills the SP during the transformation, right where ZF devours it the most. The two new rules: wait until there are nine Sunderblades on the ground before the Ultimate from Akekuri, and do not let the SP hit the cap during the transformation.
In the app 2-step rotation · 4 gear builds · 3 pros / 2 cons · 2 pitfalls · 1 matchup note · video walkthrough
Zn0nym0us - ZF with SP to spare (Alesh and Akekuri)
Alesh · Akekuri · Perlica; difficulty 2/5 — no Arclight, with a reserve for cancelling attacks
Low (2/5 from the author; damage 3/5)
Zn0nym0us - ZF with SP to spare (Alesh and Akekuri)
Alesh · Akekuri · Perlica; difficulty 2/5 — no Arclight, with a reserve for cancelling attacks
The only team of the video without Arclight (1.2 guide, before Liino): «the rotation is quite simple». Alesh inherits the Thermite Cutter, Akekuri brings the Flares, and the new rule is about formation: Perlica goes BEFORE ZF in the team order, so her Combo fires first and the Electrification is already set when the Array from ZF converts. 3/5 damage with 2/5 difficulty — and so much reserve SP that you can spend it cancelling enemy attacks.
In the app 2-step rotation · 2 gear builds · 3 pros / 2 cons · 3 pitfalls · 1 matchup note · video walkthrough
Maygi - Arcane · Perlica · Gilberta
Arcane (WILL) · Perlica · Gilberta
Medium Boss / Single-target
Maygi - Arcane · Perlica · Gilberta
Arcane (WILL) · Perlica · Gilberta
The guide's reference team and the highest overall performer on a single target: Arcane gifts a Nature Infliction stack with her Combo and with her Ultimate, Perlica sets the loop tempo with her Combo, and Gilberta charges so fast she fits two Ultimates per rotation. A 57-second rotation, calculated at 71K team DPS with BIS weapons.

In the app 4-step rotation · 2 rotation variants · 4 gear builds · 4 pros / 4 cons · 5 pitfalls · 4 matchup notes · video walkthrough
Maygi - No Gilberta: Fluorite
Arcane (WILL) · Fluorite · Perlica
Medium Boss / Single-target
Maygi - No Gilberta: Fluorite
Arcane (WILL) · Fluorite · Perlica
The same rotation concept when you do not have Gilberta: Fluorite takes her seat and provides 3 free Nature Inflictions per rotation (against Gilberta's 2) at the cost of buffing nobody. A 55-second rotation and 56K team DPS. If you do not have Arcane either, the team with Antal as the "Arcane at home" has its own guide.

In the app 3-step rotation · 1 rotation variant · 4 gear builds · 4 pros / 4 cons · 3 pitfalls · 3 matchup notes · video walkthrough
Maygi - NO Arcane, no Gilberta: Antal
Antal · Fluorite · Perlica (no other 6-star)
Medium Boss / Single-target
Maygi - NO Arcane, no Gilberta: Antal
Antal · Fluorite · Perlica (no other 6-star)
The team for those who have neither Arcane nor Gilberta: no other 6-star operator. Antal plays "Arcane at home" with Detonation Unit and the Qingbo set, duplicating with his Combo the Nature Infliction Fluorite applies, at the cost of a 100 SP tax. The rotation concept is the same as the rest of the guide's teams; the author warns that without Arcane the results leave a bit to be desired, as her substitutes have little to no buffing.
In the app 2-step rotation · 2 rotation variants · 4 gear builds · 4 pros / 4 cons · 4 pitfalls · 3 matchup notes · video walkthrough
YZ-月咒 - Arcane (WILL) · Perlica · Liino
Arcane (WILL) · Perlica · Liino; a 9-arrow cold start and an infinite 5-arrow loop
Medium Boss / Single-target
YZ-月咒 - Arcane (WILL) · Perlica · Liino
Arcane (WILL) · Perlica · Liino; a 9-arrow cold start and an infinite 5-arrow loop
The popular Typhoeus team according to the author: Typhoeus, Arcane in WILL form, Perlica and Liino. Perlica is the swappable seat — with Ardelia the single-target damage is higher and more extreme, but with Perlica there is one Battle Skill less to press, the axis reads simpler and more direct, and that makes it the version for anyone starting to learn the team; the Ardelia one goes in another video. The video focuses on understanding why the loop holds: 'I cast everything and the HP does not move' comes from not having understood Typhoeus. It all reduces to two cycles: the 9-arrow one, which cold-starts the team, and the 5-arrow one, which repeats endlessly.
In the app 3-step rotation · 2 rotation variants · 4 gear builds · 4 pros / 4 cons · 6 pitfalls · 2 matchup notes · video walkthrough
YZ-月咒 - Arcane (WILL) · Perlica · Xaihi
Arcane (WILL) · Perlica · Xaihi; no Gilberta, no Liino: one charge lap and one burst lap
Low (formulaic axis, per the author) Boss / Single-target
YZ-月咒 - Arcane (WILL) · Perlica · Xaihi
Arcane (WILL) · Perlica · Xaihi; no Gilberta, no Liino: one charge lap and one burst lap
The Typhoeus team without Gilberta or Liino: Arcane in WILL form, Perlica and Xaihi in seats 3 and 4, and Perlica can be swapped for Fluorite with the same plan. The author presents it as a formulaic axis for lazy players: two phases, one charge lap and one burst lap; the first charge lap starts with 9 arrows and every one after it needs only 5, and the author holds it is not behind the teams with Gilberta or Liino. The only thing to manage is the Cryo Infliction left by the Combo from Xaihi, and that is solved by turning it into Corrosion with the Battle Skill from Arcane, which even improves the total damage; it does not ask for fine hands.
In the app 2-step rotation · 2 rotation variants · 4 gear builds · 5 pros / 5 cons · 6 pitfalls · 3 matchup notes · video walkthrough
YZ-月咒 - NO Arcane: Purrchena · Perlica · Liino
Purrchena · Perlica · Liino; the 无诀队 (no-Arcane team): three charge laps and one burst lap, five arrows per lap
Low (quick-start guide) Boss / Single-target
YZ-月咒 - NO Arcane: Purrchena · Perlica · Liino
Purrchena · Perlica · Liino; the 无诀队 (no-Arcane team): three charge laps and one burst lap, five arrows per lap
The Typhoeus team for anyone without Arcane (无诀队): Purrchena takes the Nature Infliction seat the team needs no matter what, and Perlica and Liino stay as in the Arcane version. The author presents her as the best Arcane substitute for now: each Nature layer costs her 80 SP, or 60 if her shield blocks a hit, and according to the author she hangs it faster and with less SP than Fluorite, although as a pure applier she stays below Arcane. A 5-arrow axis: three charge laps and one burst lap, and the Combo from Typhoeus is saved to open the next lap, because its Barrage Array leaves 6s of Nature Burst DMG Taken. Purrchena's Combo and Ultimate have no fixed slot; the author also suggests her for high-pressure content, where survival matters.

In the app 3-step rotation · 1 rotation variant · 4 gear builds · 5 pros / 5 cons · 5 pitfalls · 2 matchup notes · video walkthrough
终末协约攻略组 - NO Arcane: Purrchena · Perlica · Xaihi
Purrchena · Perlica · Xaihi; the transitional Nature team: Typhoeus on basics and every Combo as soon as it lights
Low (no axis to memorize) General / Survival
终末协约攻略组 - NO Arcane: Purrchena · Perlica · Xaihi
Purrchena · Perlica · Xaihi; the transitional Nature team: Typhoeus on basics and every Combo as soon as it lights
The Typhoeus Nature team for newer players who do not have Arcane yet: Purrchena applies Nature Infliction with the second press of her Battle Skill, Perlica forces Electrification with her Combo and Xaihi fires her Ultimate, which grants Nature Amp. There is no axis to memorize: Typhoeus is controlled with basics and Final Strikes, and every Combo and every Ultimate goes out as soon as it lights. According to the author, the total damage sits somewhat below the usual teams, in exchange for the survivability Purrchena brings. Xaihi's seat accepts Gilberta, Liino or Arcane (WILL).
In the app 3-step rotation · 4 gear builds · 5 pros / 4 cons · 4 pitfalls · 2 matchup notes · video walkthrough
Five-star Electric Caster who carries the damage here: her Battle Skill applies Electric Infliction and her Combo, fired by a Final Strike from the controlled operator, forces an Electrification. Her keystones give her ATK every time she applies Electrification (two stacks) and strengthen the Arts DMG Taken of her Combo's Electrification, and her Ultimate is a chunk of orbital debris crashing down with massive Electric damage. With the table set, she lands the one-million non-crit hit that opens Raaay丶's video.
Dossier
- Codename
- Perlica
- Faction
- Endfield Industries
- Race
- Liberi
- Gender
- Female
- Birthday
- March 16
- Voice
- 陈婷婷 (CN) · Jane Jackson (EN) · 若山詩音 (JP) · 유혜지 (KR)
Physical examination
- physiological strengthStandard
- combat skillStandard
- tactical acumenOutstanding
- originium arts assimilationExcellent
Oripathy negative, based on medical examination reports.
Read the file 3 entries
Perlica is the Supervisor of Endfield Industries and the official spokesperson of the company. She is primarily responsible for overseeing and advancing the development and application of Protocol-Originium technology, while also managing the operations of Dijiang.
As an outstanding expert in Techno-Protocol, she guided research that had a key influence on the adaptive development and application of the technology, and helped refine the Automated Industry Complex (AIC Factory).
She is capable of responding to various crises in a calm and decisive manner. However, Endfield often faces challenges that go beyond all expectations. While the Endministrator was in hibernation, she took command of the Crisis Team, leading the heroes of Endfield Industries in a battle for a greater cause. Perlica moves tirelessly across the Civilization Band, doing whatever she can to maintain order and keep things running.

- JAペリカ
- ZH佩丽卡
- KO펠리카
- ClassCaster
- RoleBuffer
- Most usedWild Wanderer
- Most used setPulser Labs
- Comps32