
Teams
17 comps · Rossi11 curated guides, one per carry — 72 comps in total. Each comp shows its pitch, lineup and the weapons it runs; the full guide (rotation, gear notes, pitfalls, video) lives in the app.
No comp matches those filters — try removing one.

Rossi
Unique hybrid sub-DPS. Converts Arts Inflictions into Physical Statuses and applies Razor Clawmark to buff the entire team's damage.
17 comps
Rossi
Unique hybrid sub-DPS. Converts Arts Inflictions into Physical Statuses and applies Razor Clawmark to buff the entire team's damage.
YZ-月咒 - Burning Sequence
Wulfgard · Pogranichnik · Gilberta
High Boss / Single-target
YZ-月咒 - Burning Sequence
Wulfgard · Pogranichnik · Gilberta
Very-high-ceiling physical comp on a single continuous combo chain: predictable and satisfying, but demands exact timings and dodging.






In the app 4-step rotation · 2 rotation variants · 4 gear builds · 6 pros / 4 cons · 5 pitfalls · video walkthrough
Maygi - Arts (Antal)
Perlica · Gilberta · Antal
High Boss / Single-target
Maygi - Arts (Antal)
Perlica · Gilberta · Antal
Rossi's highest-DPS Arts team: everything is built to squeeze her 27-hit Heat Ultimate.



In the app 3-step rotation · 1 rotation variant · 4 gear builds · 5 pros / 4 cons · 5 pitfalls · 3 matchup notes · video walkthrough
YZ-月咒 - Fire Wheelchair
Camille · Arcane · Gilberta
Low Boss / Single-target
YZ-月咒 - Fire Wheelchair
Camille · Arcane · Gilberta
Rossi's brain-dead Fire flavor: a formulaic two-charge-axes + one-burst sequence you repeat the entire fight. Rossi plays her Heat side and her Ultimate carries almost all the damage; Camille, Arcane and Gilberta hand her SP, the Link buff, Corrosion and Arts Susceptibility. Camille swaps for Tangtang or Perlica with barely a change to the rest.

In the app 3-step rotation · 2 rotation variants · 4 gear builds · 5 pros / 5 cons · 5 pitfalls · 2 matchup notes · video walkthrough
阿卡秋_ArkQiu - Rossi + Arcane INT Dual-C
Camille · Gilberta · Arcane INT
Medium Boss / Single-target
阿卡秋_ArkQiu - Rossi + Arcane INT Dual-C
Camille · Gilberta · Arcane INT
The dual-carry take on Rossi's Fire team: Arcane joins in INT form as a second DPS instead of a support bot. Two charge axes to open and a two-axis cycle repeating all fight, with Camille handing out SP and one Link per carry, and Gilberta adding Arts Susceptibility. Everything is built around exact recharge thresholds.
In the app 4-step rotation · 4 gear builds · 5 pros / 4 cons · 6 pitfalls · video walkthrough
Zn0nym0us - The easiest Rossi (F2P, no Gilberta)
Akekuri · Wulfgard · Perlica; damage 4/5 at difficulty 1/5, on the scale of the author himself
Very low (1/5 from the author; damage 4/5) Boss / Endgame (0 Ultimate at the start)
Zn0nym0us - The easiest Rossi (F2P, no Gilberta)
Akekuri · Wulfgard · Perlica; damage 4/5 at difficulty 1/5, on the scale of the author himself
First team of the «Gilberta-less and F2P» guide from Zn0nym0us (1.1 era): after the wave of players without Gilberta who could not run his original 13 teams, he spent days testing Gilberta-free lineups and this one stayed as the star recommendation for anyone starting out — «this might be the easiest Rossi team to play», with no complicated timings and high damage all the same. His whole series uses repeatable rotations from 0 Ultimate energy, built for the endgame where you are not allowed to start charged. The showcase runs a level 1 Eminent Repute on Rossi, on purpose: the sequence is what you copy.

In the app 2-step rotation · 1 gear builds · 4 pros / 3 cons · 3 pitfalls · 2 matchup notes · video walkthrough
Zn0nym0us - Rossi with Chen and the Endministrator (Crush between sequences)
Chen Qianyu · Endministrator · Akekuri; 4.5/5 damage — the Crush lands BETWEEN the two sequences of the Combo from Rossi
Medium-high (3.5/5 from the author; damage 4.5/5) Boss / Endgame (0 Ultimate at the start)
Zn0nym0us - Rossi with Chen and the Endministrator (Crush between sequences)
Chen Qianyu · Endministrator · Akekuri; 4.5/5 damage — the Crush lands BETWEEN the two sequences of the Combo from Rossi
It took the author a while to find a team that brought out the best of Chen Qianyu and Rossi at once (1.1 era), and the answer was a technique: the Endministrator lands his Crush BETWEEN the first and second sequences of the Combo from Rossi. The trick exists because the Combo from Rossi tolerates its Vulnerability getting consumed midway — the second sequence restocks the stacks anyway — so the Crush cashes all four and Rossi recovers them on the spot. Damage 4.5/5, difficulty 3.5/5: it is a matter of timing.


In the app 3-step rotation · 1 gear builds · 3 pros / 2 cons · 2 pitfalls · 2 matchup notes · video walkthrough
Zn0nym0us - Rossi with Lifeng and his two Links
Pogranichnik · Lifeng · Akekuri; two hours of testing for a burst where Lifeng consumes one Link and Rossi the other
High (4.5/5 from the author; damage 4/5) Boss / Endgame (0 Ultimate at the start)
Zn0nym0us - Rossi with Lifeng and his two Links
Pogranichnik · Lifeng · Akekuri; two hours of testing for a burst where Lifeng consumes one Link and Rossi the other
A viewer asked for Lifeng with Rossi and the author confessed the cost: «almost two hours of testing» before finding a reliable rotation, because the Combo from Lifeng is hard to control (1.1 era). The result is this team and its signature: the burst generates two Links and splits them — the Ultimate from Lifeng consumes the first and the one from Rossi the second. Pogranichnik brings the Breach and Akekuri the usual glue.

In the app 3-step rotation · 1 gear builds · 3 pros / 3 cons · 2 pitfalls · 2 matchup notes · video walkthrough
Zn0nym0us - Premium Rossi with Tangtang (team damage)
Tangtang · Gilberta · Perlica; 5/5 TEAM damage — two limiteds and the early wave of the OLDEN STARE
Medium (3/5 from the author; team damage 5/5) Boss / Endgame (0 Ultimate at the start)
Zn0nym0us - Premium Rossi with Tangtang (team damage)
Tangtang · Gilberta · Perlica; 5/5 TEAM damage — two limiteds and the early wave of the OLDEN STARE
The most premium team of the 13-team guide from Zn0nym0us (1.1 era), honest nuance included: it is not the best PERSONAL damage for Rossi, but it is «one of the highest team damages in the game» for her. Tangtang brings Susceptibility, extra DPS and her lockdown — useful against specific boss mechanics. The whole series runs from 0 Ultimate with the showcase on a level 1 weapon.

In the app 3-step rotation · 1 gear builds · 3 pros / 3 cons · 3 pitfalls · 2 matchup notes · video walkthrough
Zn0nym0us - Rossi with Pogranichnik (the best personal damage)
Pogranichnik · Gilberta · Perlica; 5/5 with Breach all fight — and the final Breach after the Ultimate, for the snapshot
Medium (3/5 from the author; damage 5/5) Boss / Endgame (0 Ultimate at the start)
Zn0nym0us - Rossi with Pogranichnik (the best personal damage)
Pogranichnik · Gilberta · Perlica; 5/5 with Breach all fight — and the final Breach after the Ultimate, for the snapshot
«The best personal damage team for Rossi» of the 13-team guide (1.1 era): the Breach from Pogranichnik raises physical damage taken across the WHOLE fight — not only the burst — and feeds the basic, the Battle Skill, the Combo and the first talent from Rossi at once. A single rotation serves as opening and loop, and the author scores it 5/5 damage at 3/5 difficulty: «very simple».
In the app 2-step rotation · 1 gear builds · 3 pros / 3 cons · 2 pitfalls · 2 matchup notes · video walkthrough
Zn0nym0us - F2P Rossi with the crystal of the Endministrator
Endministrator · Wulfgard · Perlica; the crystal broken between sequences and two free stacks to reset
Medium (3/5 from the author; damage 4/5) Boss / Endgame (0 Ultimate at the start)
Zn0nym0us - F2P Rossi with the crystal of the Endministrator
Endministrator · Wulfgard · Perlica; the crystal broken between sequences and two free stacks to reset
The team «you can build entirely for free» of the 13-team guide (1.1 era): Endministrator, Wulfgard and Perlica around Rossi, with both house technical rules together — the Battle Skill from Wulfgard BEFORE the electric Combo (or his Heat consumes the Electrification leaving no Infliction) and the Crush from the Endministrator on his crystal BETWEEN the two sequences of the Combo from Rossi, returning «two free stacks to reset the rotation». 4/5 damage at 3/5 difficulty.
In the app 3-step rotation · 1 gear builds · 3 pros / 2 cons · 2 pitfalls · 1 matchup note · video walkthrough
Zn0nym0us - The most requested Rossi (Wulfgard, Perlica and Gilberta)
Wulfgard · Perlica · Gilberta; difficulty 2/5 — the one the community asked for, with the Wulfgard-first rule
Low (2/5 from the author; damage 3.5/5) Boss / Endgame (0 Ultimate at the start)
Zn0nym0us - The most requested Rossi (Wulfgard, Perlica and Gilberta)
Wulfgard · Perlica · Gilberta; difficulty 2/5 — the one the community asked for, with the Wulfgard-first rule
«One of the most asked team comps I have seen through the community» (1.1 era). Wulfgard opens the fight on purpose: on a clean enemy his final shot leaves Heat Infliction, but with an active reaction he would consume it instead of marking — that is why he fires before Perlica electrifies anything. 3.5/5 damage and 2/5 difficulty: the comfort of two Arts Infliction batteries feeding the Combo from Rossi and a stair-step close into the Corrosion.
In the app 2-step rotation · 2 gear builds · 3 pros / 2 cons · 2 pitfalls · 1 matchup note · video walkthrough
Zn0nym0us - Rossi with Ardelia and the clean enemy
Pogranichnik · Ardelia · Gilberta; difficulty 3/5 — the circle of dirtying, cashing and cleaning
Medium (3/5 from the author; damage 3.5/5) Boss / Endgame (0 Ultimate at the start)
Zn0nym0us - Rossi with Ardelia and the clean enemy
Pogranichnik · Ardelia · Gilberta; difficulty 3/5 — the circle of dirtying, cashing and cleaning
The sheet that explains why Ardelia is not the second best support for Rossi (1.1 era): her Combo only triggers on a Final Strike against an enemy WITHOUT Vulnerability or Arts Infliction — exactly what Rossi needs and manufactures. The solution is Pogranichnik, «the number 1 choice for any team with Ardelia»: his Breach consumes the stacks, returns SP and leaves the enemy clean for the next cycle. 3.5/5 damage, 3/5 difficulty.

In the app 2-step rotation · 2 gear builds · 3 pros / 3 cons · 3 pitfalls · 1 matchup note · video walkthrough
Zn0nym0us - Rossi Tackle Noob (the friendly speedrun)
Perlica · Gilberta · Akekuri; difficulty 2/5 — 5/5 damage: everything into the Ultimate from Rossi
Low (2/5 from the author; damage 5/5) Boss speedrun (0 Ultimate at the start)
Zn0nym0us - Rossi Tackle Noob (the friendly speedrun)
Perlica · Gilberta · Akekuri; difficulty 2/5 — 5/5 damage: everything into the Ultimate from Rossi
«The boss will never see what hit them» (1.1 era). The first of the two speedrun teams of the video: the whole design pushes damage into the Ultimate from Rossi. Perlica adds an extra Battle Skill per lap to fatten the Combo from Rossi, Akekuri cashes every Stagger with her Combo, and the burst serves Corrosion and Link right before the close. 5/5 damage from the author with a rotation «very newbie friendly»: 2/5.
In the app 2-step rotation · 2 gear builds · 3 pros / 2 cons · 2 pitfalls · 2 matchup notes · video walkthrough
Zn0nym0us - Rossi on two reactions (Combustion and Corrosion)
Akekuri · Wulfgard · Gilberta; difficulty 3.5/5 — the order of two Battle Skills decides the reaction
Medium (3.5/5 from the author; damage 3.5/5) Boss / Endgame (0 Ultimate at the start)
Zn0nym0us - Rossi on two reactions (Combustion and Corrosion)
Akekuri · Wulfgard · Gilberta; difficulty 3.5/5 — the order of two Battle Skills decides the reaction
The sheet that teaches the reaction system with two buttons (1.1 era). On the lap, the Battle Skill from Gilberta goes first and the one from Wulfgard on top: Combustion. In the burst the order flips — Wulfgard first, Gilberta after — and the same pair manufactures Corrosion for the close. Four Ultimates in a row and 3.5/5 damage with 3.5/5 difficulty.
In the app 2-step rotation · 1 gear builds · 3 pros / 2 cons · 2 pitfalls · 1 matchup note · video walkthrough
Zn0nym0us - Rossi with Alesh: crystal and Solidification
Endministrator · Alesh · Perlica; difficulty 4/5 — two clocks: the gap Crush and the Solidification
High (4/5 from the author; damage 3/5) Boss / Endgame (0 Ultimate at the start)
Zn0nym0us - Rossi with Alesh: crystal and Solidification
Endministrator · Alesh · Perlica; difficulty 4/5 — two clocks: the gap Crush and the Solidification
The most demanding sheet of the video (1.1 era): the crystal lap of the Endministrator with Alesh as the angler. Every shattered crystal triggers his Combo — his kit trigger is the consumption of reactions and crystals — and in the burst his Ultimate seeds Cryo Infliction so his Battle Skill turns it into forcible Solidification. 3/5 damage and 4/5 difficulty: the author charges in timing what the sheet pays in system.

In the app 2-step rotation · 2 gear builds · 3 pros / 3 cons · 3 pitfalls · 1 matchup note · video walkthrough
Zn0nym0us - Rossi with the Endministrator and Gilberta (the two houses)
Endministrator · Perlica · Gilberta; difficulty 2.5/5 — the crystal lap inside the electric factory
Medium-low (2.5/5 from the author; damage 4/5) Boss / Endgame (0 Ultimate at the start)
Zn0nym0us - Rossi with the Endministrator and Gilberta (the two houses)
Endministrator · Perlica · Gilberta; difficulty 2.5/5 — the crystal lap inside the electric factory
«This will combine all the Endministrator rotation and the normal Perlica with Gilberta rotation» (1.1 era). The two houses of the tab in a single lap: the crystal and its Crush on one side, the Electrification that triggers the Combo from Gilberta on the other. The new rule is bookkeeping: the Crush goes before the second sequence from Rossi AND before the Combo from Gilberta, so the count returns to 4 Vulnerability stacks on every lap. 4/5 damage, 2.5/5 difficulty.
In the app 2-step rotation · 2 gear builds · 3 pros / 3 cons · 2 pitfalls · 2 matchup notes · video walkthrough
终末协约攻略组 - Mixed, NO Camille: Purrchena · Mi Fu · Pogranichnik
Purrchena · Mi Fu · Pogranichnik; Rossi's mixed team without Camille: Battle Skills 1-2-2 and 1-3-3 in team order
Low (repeat 1-2-2 and 1-3-3) General / Survival
终末协约攻略组 - Mixed, NO Camille: Purrchena · Mi Fu · Pogranichnik
Purrchena · Mi Fu · Pogranichnik; Rossi's mixed team without Camille: Battle Skills 1-2-2 and 1-3-3 in team order
Rossi's mixed team for anyone without Camille: Purrchena takes his seat and, according to the author, partly covers the SP Camille used to return. Rossi and Mi Fu are the two carries and Pogranichnik is the sub-DPS. The axis is a short loop of Battle Skills in team order (1-2-2, 1-3-3): Rossi opens the Vulnerability, Purrchena applies the Nature Infliction that lights Rossi's Combo, and at 4 layers Mi Fu finishes with Trail and Mangle and World Splitter. According to the author, two loops are usually enough to fill the Ultimate, which goes out to land the burst in the enemy's Stagger. In exchange for somewhat less total damage, Purrchena adds survivability.

In the app 3-step rotation · 4 gear builds · 4 pros / 3 cons · 3 pitfalls · 2 matchup notes · video walkthrough

Yvonne
A Cryo hyper-carry built entirely around her Ultimate. She can't apply Inflictions on her own — the team stacks Cryo on the boss, she consumes them with her Battle Skill to force Solidification and generate energy, then cashes it all into a 220-cost Ultimate that unloads a hail of bullets. Almost all her damage lands in that window, so placing the Combo well and timing the Ultimate is everything.
11 comps
Yvonne
A Cryo hyper-carry built entirely around her Ultimate. She can't apply Inflictions on her own — the team stacks Cryo on the boss, she consumes them with her Battle Skill to force Solidification and generate energy, then cashes it all into a 220-cost Ultimate that unloads a hail of bullets. Almost all her damage lands in that window, so placing the Combo well and timing the Ultimate is everything.
Maygi - Cryo Perlica
Xaihi · Gilberta · Perlica
High Boss / Single-target
Maygi - Cryo Perlica
Xaihi · Gilberta · Perlica
Cryo hyper-carry: the team feeds her Inflictions and she cashes it all into a 220-cost Ultimate that unloads a hail of bullets.

In the app 4-step rotation · 1 rotation variant · 4 gear builds · 4 pros / 4 cons · 5 pitfalls · 6 matchup notes · video walkthrough
叫我棉被 - Daily (Alesh)
Xaihi · Gilberta · Alesh
Medium General / Daily
叫我棉被 - Daily (Alesh)
Xaihi · Gilberta · Alesh
The universal, flexible version of Yvonne's team: fixed Xaihi+Gilberta core and an accessible 4th slot (Alesh) that gives SP and ATK. Free startup, without the frame-tight window of the Perlica comp.
In the app 3-step rotation · 1 rotation variant · 4 gear builds · 3 pros / 3 cons · 3 pitfalls · 1 matchup note · video walkthrough
叫我棉被 - Boss (Ardelia)
Xaihi · Gilberta · Ardelia
High Boss / Single-target
叫我棉被 - Boss (Ardelia)
Xaihi · Gilberta · Ardelia
The boss/hard-content version: Ardelia in the 4th slot instead of the applicator. Her strong buff raises total damage at the cost of less Infliction stacking and less stagger.

In the app 3-step rotation · 4 gear builds · 2 pros / 2 cons · 2 pitfalls · video walkthrough
YZ-月咒 - Universal Corrosion Burst
Arcane (WILL) · Xaihi · Gilberta
High Boss / Single-target
YZ-月咒 - Universal Corrosion Burst
Arcane (WILL) · Xaihi · Gilberta
The Arcane flavor of Yvonne's Cryo team: more burst than the Tangtang version in exchange for more APM. Arcane (in WILL form) feeds the chain with Nature Infliction, converts it into Corrosion and stacks Susceptibility; Xaihi amplifies the whole team's Cryo/Nature damage scaling off her Intellect; Gilberta pays the team's Energy thresholds with her talent and closes the burst with her Ultimate. The author tested it against the patch's bosses and the Ultimate lands right on the Stagger.
In the app 3-step rotation · 1 rotation variant · 4 gear builds · 4 pros / 3 cons · 7 pitfalls · 1 matchup note · video walkthrough
Pakinov - Yvonne with Arcane as support (WILL form)
Arcane (WILL) · Tangtang · Xaihi; every layer doubles itself and the Battle Skill rides the edge of the Ultimate
Medium (two paced laps and a clocked closer) Boss / Single-target
Pakinov - Yvonne with Arcane as support (WILL form)
Arcane (WILL) · Tangtang · Xaihi; every layer doubles itself and the Battle Skill rides the edge of the Ultimate
The support half of the perfect-rotations video from Pakinov: for him, the strongest Yvonne composition right now. The engine is the WILL form of Arcane — her Combo fires on a single layer of any element and hangs another of the same one — and the closer is pure clockwork: shooting through the Ultimate from Yvonne stacking crit and squeezing her Battle Skill right before it ends. Same warning as the other half: the showcase runs weak gear on purpose, no reference clear. With Last Rite as the carry it stays announced as playable with small changes.
In the app 3-step rotation · 1 rotation variant · 4 pros / 3 cons · 4 pitfalls · 2 matchup notes · video walkthrough
Zn0nym0us - Yvonne for starters (Snowshine)
Snowshine · Gilberta · Xaihi; difficulty 2/5 — Yvonne with an umbrella: parry, healing and room for error
Low (2/5 from the author) Boss / Endgame (no pre-fight prep)
Zn0nym0us - Yvonne for starters (Snowshine)
Snowshine · Gilberta · Xaihi; difficulty 2/5 — Yvonne with an umbrella: parry, healing and room for error
The first team of the Yvonne guide from Zn0nym0us (1.0-1.1 era), meant for whoever fields her first: Snowshine is «the most beginner friendly support» — protection, Cryo Infliction, SP refund and Solidification with her Ultimate. It is not the maximum damage for Yvonne and the author says so plainly: what you buy is ease of execution and space to make mistakes. The whole guide runs with zero pre-fight preparation («no prep, no pre-cast»), on the same endgame philosophy as his other series.

In the app 2-step rotation · 3 pros / 3 cons · 4 pitfalls · 2 matchup notes · video walkthrough
Zn0nym0us - Yvonne without Gilberta (Perlica and Ardelia)
Perlica · Ardelia · Xaihi; 4.5/5 — high F2P damage on the 90% timing of the Combo from Perlica
High (4.5/5 from the author) Boss / Endgame (no pre-fight prep)
Zn0nym0us - Yvonne without Gilberta (Perlica and Ardelia)
Perlica · Ardelia · Xaihi; 4.5/5 — high F2P damage on the 90% timing of the Combo from Perlica
The team for whoever lacks Gilberta (1.0-1.1 era): Ardelia takes the seat with her Combo Corrosion, her Physical Susceptibility and the Ultimate healing — without fixing the SP hunger, and with an exclusion rule the author makes plain: Ardelia and Gilberta together, NO — the Vulnerability from the Combo of Gilberta stops the one from Ardelia from firing. High damage and sustain in exchange for the finest timing in the guide short of the 5/5: the Combo from Perlica gets clocked at 90% of its cooldown.
In the app 2-step rotation · 3 pros / 3 cons · 3 pitfalls · 1 matchup note · video walkthrough
YZ-月咒 - Tangtang · Xaihi · Gilberta (1.5 remake)
Tangtang · Xaihi · Gilberta; no Arcane: two identical charge laps and a short burst
Low (a wheelchair team, per the author) Boss / Single-target
YZ-月咒 - Tangtang · Xaihi · Gilberta (1.5 remake)
Tangtang · Xaihi · Gilberta; no Arcane: two identical charge laps and a short burst
The 1.5 remake of the Yvonne team with Tangtang the author had already built in 1.1: Yvonne, Tangtang, Xaihi and Gilberta, one of Yvonne's two most common lineups; the other swaps Tangtang for Arcane. The author compares both: with Arcane there is more support, more burst and longer-lasting Corrosion, but the axis is somewhat harder; with Tangtang the whole team is much simpler, a wheelchair. Two identical charge laps and a short burst: Tangtang and Xaihi put the two Cryo layers, Yvonne consumes them with her Battle Skill and her talent gives her an instant Final Strike, and the burst chains the Ultimates from Yvonne, Xaihi and Gilberta with a Battle Skill from Tangtang in between so Gilberta turns that Cryo into Corrosion. With Gilberta on Swordmancer, according to the author, the axis stays aligned with the Stagger of most bosses and Tangtang's Ultimate is not needed in the cycle.
In the app 3-step rotation · 1 rotation variant · 4 gear builds · 5 pros / 5 cons · 5 pitfalls · 2 matchup notes · video walkthrough
终末协约攻略组 - Cryo with Purrchena: Xaihi · Gilberta
Purrchena · Xaihi · Gilberta; the simple version of the Cryo team: Nature layers for two Battle Skills from Yvonne and her Ultimate
Low (the author's simple version) General / Survival
终末协约攻略组 - Cryo with Purrchena: Xaihi · Gilberta
Purrchena · Xaihi · Gilberta; the simple version of the Cryo team: Nature layers for two Battle Skills from Yvonne and her Ultimate
The Yvonne Cryo team in its most comfortable version (更加轮椅): Yvonne and Purrchena with two supports to pick among Xaihi, Gilberta, Arcane (WILL) and Fluorite; this card has Xaihi and Gilberta. Everything revolves around charging Yvonne's Ultimate, and according to the author that takes two Battle Skills consuming 5 Infliction layers in total: in the simple version, a batch of 2 Nature layers and another of 3, each consumed by a Battle Skill from Yvonne. For more damage, Xaihi's Battle Skill grants Arts Amp and the two batches become 3 Nature layers and 2 Cryo layers. According to the author, somewhat less total damage than the usual teams, in exchange for Purrchena's survivability.
In the app 2-step rotation · 4 gear builds · 4 pros / 3 cons · 3 pitfalls · 5 matchup notes · video walkthrough
终末协约攻略组 - Cryo with Purrchena: Arcane (WILL) · Fluorite
Purrchena · Arcane (WILL) · Fluorite; the card's other two supports, with the same simple version of the axis
Low (the author's simple version) General / Survival
终末协约攻略组 - Cryo with Purrchena: Arcane (WILL) · Fluorite
Purrchena · Arcane (WILL) · Fluorite; the card's other two supports, with the same simple version of the axis
The second card of the Yvonne Cryo team: the author lets you pick any two supports among Xaihi, Gilberta, Arcane (WILL) and Fluorite, and this is the Arcane and Fluorite pair. Yvonne and Purrchena are the same as on the other card, and the simple version of the axis does not change: two Nature batches (2 and 3 layers), each consumed by a Battle Skill from Yvonne, and her Ultimate. Arcane stacks Will up to 640 without losing her charge threshold, and Fluorite goes for her Ultimate to reapply Infliction or for less Combo cooldown. The author's higher-damage variant uses Xaihi's Battle Skill, which this pair does not have.

In the app 1-step rotation · 4 gear builds · 4 pros / 3 cons · 3 pitfalls · 1 matchup note · video walkthrough
Raaay丶 - NO Arcane, Gilberta or Tangtang: Xaihi · Ardelia · Alesh
Yvonne as the only limited: one base axis of 40s laps, the same lap to charge and to burst
Low (a single base axis, «easy to copy» per the author) Boss / Single-target
Raaay丶 - NO Arcane, Gilberta or Tangtang: Xaihi · Ardelia · Alesh
Yvonne as the only limited: one base axis of 40s laps, the same lap to charge and to burst
Raaay丶's low-budget team for players who have Yvonne but not Arcane, Gilberta or Tangtang: Yvonne with Xaihi, Ardelia and Alesh («伊赛羊鱼»). According to the author, it is the low-budget team that best lets you feel Yvonne: SP does not stall and the cycle is short. Ardelia puts Corrosion with her Combo and consumes it with her Battle Skill, which lights the Combo from Alesh; the Ultimate from Alesh and the Combo from Xaihi put the two Cryo layers that the Battle Skill from Yvonne turns into Solidification. You learn a single base axis: the charge lap is the same one without the Ultimates from Xaihi, Yvonne and Ardelia, and the only thing that moves with the fight is Alesh's Ultimate. It also brings a short lap to cold start or get back on track, and build panels for all four.
In the app 3-step rotation · 4 gear builds · 5 pros / 5 cons · 5 pitfalls · 3 matchup notes · video walkthrough

Mi Fu
Mi Fu as a Physical Crush main DPS. Four teams: Maygi's core with Ardelia or Lifeng, her Rossi hybrid with Rossi as enabler, and YZ's budget icebreaker with Estella and Alesh.
9 comps

Mi Fu
Mi Fu as a Physical Crush main DPS. Four teams: Maygi's core with Ardelia or Lifeng, her Rossi hybrid with Rossi as enabler, and YZ's budget icebreaker with Estella and Alesh.
Maygi — Physical (Ardelia)
Mi Fu · Chen Qianyu · Pogranichnik · Ardelia
Mid-High CC / Mobs & Elites
Maygi — Physical (Ardelia)
Mi Fu · Chen Qianyu · Pogranichnik · Ardelia
The pure physical core with sustain. Chen Qianyu manufactures Vulnerability, Mi Fu eats it twice per cycle with her double Crush, Pog applies Breach, and Ardelia heals while leaving a very long Physical Susceptibility. The most comfortable of the three.

In the app 4-step rotation · 1 rotation variant · 4 gear builds · 4 pros / 4 cons · 4 pitfalls · 2 matchup notes · video walkthrough
Maygi — Physical (Lifeng)
Mi Fu · Chen Qianyu · Pogranichnik · Lifeng
High CC / Mobs & Elites
Maygi — Physical (Lifeng)
Mi Fu · Chen Qianyu · Pogranichnik · Lifeng
The same physical core, but swapping Ardelia for Lifeng for a rotation ~10s faster. Lifeng adds an extra debuff and SP that counts toward Vulnerability, at the cost of losing the healing.
In the app 3-step rotation · 4 gear builds · 3 pros / 3 cons · 4 pitfalls · 1 matchup note · video walkthrough
Maygi — Rossi Hybrid
Mi Fu · Rossi · Gilberta · Perlica
High CC / Mobs & Elites
Maygi — Rossi Hybrid
Mi Fu · Rossi · Gilberta · Perlica
The fastest hybrid. Here Rossi is NOT the carry: she's played as a Vulnerability battery (3 stacks in one Combo+skill) for Mi Fu to consume. Gilberta and Perlica are one of the only sources of a free starting Vulnerability stack.
In the app 3-step rotation · 4 gear builds · 3 pros / 3 cons · 4 pitfalls · 1 matchup note · video walkthrough
YZ — Budget Icebreaker
Mi Fu · Chen Qianyu · Estella · Alesh
Low General / New rosters
YZ — Budget Icebreaker
Mi Fu · Chen Qianyu · Estella · Alesh
YZ's budget icebreaker for low-investment rosters: Alesh freezes, the team stacks 4 Vulnerability without spending the damage Ultimates, and Mi Fu unloads her Crush. A stable infinite loop where every round plays the same.

In the app 3-step rotation · 1 rotation variant · 4 gear builds · 4 pros / 3 cons · 3 pitfalls · 1 matchup note · video walkthrough
Pakinov - Physical with Akekuri and double Crush
Rossi · Pogranichnik · Akekuri; Breach first and four Crushes inside the Stagger
High (the whole burst must fit inside the Stagger) Boss / Single-target
Pakinov - Physical with Akekuri and double Crush
Rossi · Pogranichnik · Akekuri; Breach first and four Crushes inside the Stagger
The only one of the three rotations in the Mi Fu video missing from the catalog — the other two are the Maygi teams already living on this tab — and, per the author, the one with the highest damage potential for Mi Fu. The showcase runs level 1 weapons on Mi Fu and Rossi («the damage is simply absurd», but no benchmark). The video itself anticipates the evolution: «when Camille releases she can replace Akekuri» — that version already exists in the catalog, documented by 叫我棉被, and the author later placed it 5% ahead in exchange for a good deal more complexity.
In the app 2-step rotation · 1 gear builds · 4 pros / 3 cons · 4 pitfalls · 2 matchup notes · video walkthrough
Zn0nym0us - Mi Fu with Ember (the wall that stacks)
Chen · Ember · Pog; utility — the Ember parry pays 2 stacks and heals
Medium (utility branch) Boss (0 energy start)
Zn0nym0us - Mi Fu with Ember (the wall that stacks)
Chen · Ember · Pog; utility — the Ember parry pays 2 stacks and heals
«Another favorite team of mine when we need more survivability» (1.3 era; part 2 of his Mi Fu guide, with a 0 energy start). Chen is the main Vulnerability source, Pog consumes it cashing SP, and Ember turns the hits from the boss into a resource: swap into the incoming attack, Battle Skill with the Protection from her talent, and her Combo triggers on its own — two Knock Downs that pay 2 stacks for 100 SP, healing included.

In the app 2-step rotation · 3 gear builds · 3 pros / 2 cons · 3 pitfalls · 1 matchup note · video walkthrough
Zn0nym0us - Mi Fu with Catcher (the wall with retaliation)
Chen · Catcher · Pog; utility — the shield stacks on its own and the Former Finery heals
Medium (utility branch) Boss (0 energy start)
Zn0nym0us - Mi Fu with Catcher (the wall with retaliation)
Chen · Catcher · Pog; utility — the shield stacks on its own and the Former Finery heals
The twin of the Ember variant (1.3 era): «almost the same, with the Catcher parry if needed and the order of the Battle Skills from Catcher and Chen swapped». His shield blocks, hands out Protection, returns 30 SP and answers every hit with 1 Vulnerability stack; with the Former Finery, it also heals now and then whoever takes damage while Protected. The burst adds the Weaken from the Ultimate of Catcher to the Crush window.

In the app 2-step rotation · 4 gear builds · 3 pros / 2 cons · 2 pitfalls · 1 matchup note · video walkthrough
Zn0nym0us - Mi Fu with Da Pan (the stack battery)
Chen · Da Pan · Pog; the wok famous for its Crush, employed here as a generator
Medium (two scheduling rules) Boss (0 energy start)
Zn0nym0us - Mi Fu with Da Pan (the stack battery)
Chen · Da Pan · Pog; the wok famous for its Crush, employed here as a generator
«Da Pan is well known for his strong Crush damage, but on the Mi Fu team we use him as a Vulnerability stack battery» (1.3 era). With an Ultimate charge set and his potential, a single Battle Skill leaves 2 stacks every 45 seconds — the Lift from the wok plus the extra stack from the keystone. The scheduling rule: his Combo goes AFTER the Breach from Pog consumes.

In the app 2-step rotation · 3 gear builds · 3 pros / 2 cons · 2 pitfalls · 1 matchup note · video walkthrough
Zn0nym0us - Mi Fu with Ardelia and Lifeng (better than Pog)
Chen · Ardelia · Lifeng; «better result and much easier» — with a formation rule
Medium (easier than with Pog) Boss (0 energy start)
Zn0nym0us - Mi Fu with Ardelia and Lifeng (better than Pog)
Chen · Ardelia · Lifeng; «better result and much easier» — with a formation rule
The last team of the guide and its discovery (1.3 era): «you can substitute Pog with Lifeng — it gave me a much better result and it is much easier to use». Lifeng leaves Physical Susceptibility with his Battle Skill, his Combo gifts the Link that the Ultimate from Chen consumes, and Ardelia adds healing, her double Susceptibility and the damage buff from her Stanza in the burst. Formation rule: Lifeng goes AFTER Ardelia in the team order.
In the app 2-step rotation · 4 gear builds · 3 pros / 2 cons · 3 pitfalls · 2 matchup notes · video walkthrough

Arcane
Nature caster with two kits in one: Array Arcana swaps battle, combo and ultimate depending on INT ≥ Will (damage) or Will > INT (support). Everything revolves around Imprison — her combo slow-mos the enemy and, in damage form, the battle skill detonates it early.
9 comps

Arcane
Nature caster with two kits in one: Array Arcana swaps battle, combo and ultimate depending on INT ≥ Will (damage) or Will > INT (support). Everything revolves around Imprison — her combo slow-mos the enemy and, in damage form, the battle skill detonates it early.
YZ-月咒 - Nature Main-C (INT form)
The author's pick until Liino releases
Mid
YZ-月咒 - Nature Main-C (INT form)
The author's pick until Liino releases
Arcane carries with the "main-C + 3 cheap supports" scheme: Tangtang brings the off-element Arts Infliction (Cryo), Xaihi buffs and healing, Gilberta gravity, grouping and Arts Susceptibility. All three need little investment, so resources go into Arcane.
In the app 4-step rotation · 1 gear builds · 4 pros / 3 cons · 3 pitfalls · 2 matchup notes · video walkthrough
YZ-月咒 - Last Rite Cryo wheelchair (WILL form)
The popular Cryo of the moment: formulaic combo (2 charge axes + 1 burst) with Arcane as the "upgraded Fluorite"
Low
YZ-月咒 - Last Rite Cryo wheelchair (WILL form)
The popular Cryo of the moment: formulaic combo (2 charge axes + 1 burst) with Arcane as the "upgraded Fluorite"
Last Rite's Cryo team (with Tangtang and Xaihi) is one of the most-played of the patch, and Arcane's arrival in WILL form genuinely strengthens it: she takes the 4th slot as an "upgraded Fluorite" (extra Cryo stacks via combo and ultimate), but her combo triggers more easily and she also brings Nature and Cryo Susceptibility, gravity and the Imprison slow-mo. The axis is formulaic: the same sequence start to finish, no improvising.

In the app 4-step rotation · 3 gear builds · 4 pros / 3 cons · 4 pitfalls · 4 matchup notes · video walkthrough
YZ-月咒 - Nature superwheelchair (INT, formulaic)
The same combo start to finish: 2 charge axes + 1 burst
Low
YZ-月咒 - Nature superwheelchair (INT, formulaic)
The same combo start to finish: 2 charge axes + 1 burst
INT-form Arcane main-C with Tangtang, Xaihi and Perlica: a formulaic combo repeated start to finish (wheelchair). The 4th slot is Perlica — the author's pick over Gilberta: slightly more damage, simpler, and her Stanza ultimate does raise Arcane's ATK (Perlica is Electric, a different element).
In the app 4-step rotation · 4 gear builds · 4 pros / 3 cons · 3 pitfalls · 1 matchup note · video walkthrough
Raaay丶 - 3-Battle-Skill Wheelchair
Xaihi · Wulfgard · Camille / Akekuri
Medium Boss / Single-target
Raaay丶 - 3-Battle-Skill Wheelchair
Xaihi · Wulfgard · Camille / Akekuri
Main-C INT-form Arcane with an infinite loop that only asks you to memorize ONE three-Battle-Skill sequence: every combo that lights up is the prompt for the next input. Wulfgard brings his Ultimate every loop via tri-fire, Corrosion refreshes endlessly and the Ultimates slot into fixed windows. Built for players who lack Tangtang, Rossi and Gilberta on their roster.
In the app 3-step rotation · 4 gear builds · 5 pros / 4 cons · 5 pitfalls · 2 matchup notes · video walkthrough
Raaay丶 - Wheelchair with Liino (Camille version)
Liino · Camille · Wulfgard; two Battle Skills light four Combos
Low
Raaay丶 - Wheelchair with Liino (Camille version)
Liino · Camille · Wulfgard; two Battle Skills light four Combos
The update the author rushed out by popular demand: the Arcane INT wheelchair, now with Liino in the Xaihi seat. The upfront warning: looking at damage alone, a potential 0 or 1 Liino is no direct upgrade; the gain is comfort — on top of a wheelchair, even more wheelchair. The axis also fully frees Wulfgard from charge requirements and switches off the Wulfgard 三火 matter so many people asked about. The Camille-less version stays in research, per the author.

In the app 3-step rotation · 1 rotation variant · 4 gear builds · 4 pros / 4 cons · 4 pitfalls · 1 matchup note · video walkthrough
YZ-月咒 - Nature Main-C with Liino
Liino · Tangtang · Xaihi; level 2 Corrosion on loop and a two-amp burst
Low-medium (the burst asks more than the laps)
YZ-月咒 - Nature Main-C with Liino
Liino · Tangtang · Xaihi; level 2 Corrosion on loop and a two-amp burst
The update of the author's Nature line — his Arcane wheelchairs ran Gilberta or Perlica in the fourth seat — with Liino now sitting there. The opening line is the damage: with Arcane, Liino and Tangtang at potential 0 and one BIS weapon copy, the Skydrummer (天鼓) goes down in one take in 1 minute 22. The execution is his usual level 2 Corrosion axis, and the author himself labels it universal: daily content plays on the same idea. For anyone without Tangtang, an alternative version is announced for the next video.
In the app 2-step rotation · 4 gear builds · 4 pros / 4 cons · 4 pitfalls · 2 matchup notes · video walkthrough
烟花弎月xyz - Double Cryo into Corrosion (Arcane INT)
Liino · Tangtang · Xaihi; two Cryo layers light Arcane, and her Nature converts them
Low (the four-Corrosion axis asks more)
烟花弎月xyz - Double Cryo into Corrosion (Arcane INT)
Liino · Tangtang · Xaihi; two Cryo layers light Arcane, and her Nature converts them
This author's «DLC 1.0» of Liino comps: near-perfect mutual buffs and multipliers through the roof, on the classic Arcane INT + double Cryo core with Liino in the fourth seat. The team logic is his own telling: Liino hits her theoretical ceiling in Nature or Electric teams, so the carry is Arcane INT, whose Combo asks for two other-element layers to fire — and converting them into Corrosion switches on her Hot Work set bonus along the way. The Cryo pair comes from Xaihi, the game's first great buffer, feeding both attackers here at once, and a Tangtang who hits hard herself and brings the team's scarcest multipliers: Arts DMG Taken and Susceptibility. The constant healing from Liino sustains the extra buff on the Battle Skill from Xaihi. Two axes: the double Cryo wheelchair, and a specialized four-Corrosion axis for infinite one-on-one.
In the app 2-step rotation · 4 gear builds · 4 pros / 5 cons · 4 pitfalls · 2 matchup notes · video walkthrough
Pakinov - Perfect DPS rotation with Akekuri (INT form)
Tangtang · Akekuri · Xaihi; four Cryo layers into level 4 Corrosion and a Link closer
Medium (long, but paced by counted chains)
Pakinov - Perfect DPS rotation with Akekuri (INT form)
Tangtang · Akekuri · Xaihi; four Cryo layers into level 4 Corrosion and a Link closer
The DPS half of the perfect-rotations video from Pakinov, the companion to his complete Arcane guide: per him, the highest damage composition in the game right now. The showcase runs weak gear on purpose — «if I use the good one, I kill the boss ahead of time» —, so there is no reference clear here: what you copy is the sequence, broken down step by step. Gilberta, Perlica and Ardelia stay declared as pieces that also fit these teams very well.
In the app 3-step rotation · 1 rotation variant · 1 gear builds · 4 pros / 3 cons · 4 pitfalls · 2 matchup notes · video walkthrough
Raaay丶 - Mixed-damage double C with the Endministrator (管诀赛鱼)
Arcane INT main C, Endministrator sub-C; Xaihi · Alesh, only Arcane is limited
High (many buttons; the author warns of dizziness) Boss / Single-target
Raaay丶 - Mixed-damage double C with the Endministrator (管诀赛鱼)
Arcane INT main C, Endministrator sub-C; Xaihi · Alesh, only Arcane is limited
Third entry in the author's Arcane teams for new accounts: after the Arcane WILL team against groups, the single-Cryo low-investment boss team and the wheelchairs with Camille or Akekuri, this is the «postgraduate» one. It answers the opening question: without Rossi you can still build a mixed-damage team, but it usually lands far from real strength; this quartet is his answer for those who want it. In the author's one line: a complete team that heals, hits, Staggers and regains SP, where everyone brings a generic buff for all. The only flaw he sees: SP comes back so fast that there are many Battle Skills and the axis gets complicated. Most importantly, he says, a new account with Arcane as its only limited can build it. It includes the «售后» video with demos in different environments and the logic for adapting the axis.

In the app 5-step rotation · 1 rotation variant · 4 gear builds · 4 pros / 4 cons · 6 pitfalls · 3 matchup notes · video walkthrough

Typhoeus
A Nature Striker who does not stack Inflictions to detonate: almost three quarters of her damage are Nature Bursts she forces herself with her Hunting Arrows. Her loop is short and modular (Battle Skill, Combo ASAP, stack Nature Infliction, repeat) and the damage comes out steady instead of as a nuke. She is hungry for Nature Inflictions and very few operators feed her: Arcane is the obvious partner.
9 comps

Typhoeus
A Nature Striker who does not stack Inflictions to detonate: almost three quarters of her damage are Nature Bursts she forces herself with her Hunting Arrows. Her loop is short and modular (Battle Skill, Combo ASAP, stack Nature Infliction, repeat) and the damage comes out steady instead of as a nuke. She is hungry for Nature Inflictions and very few operators feed her: Arcane is the obvious partner.
Maygi - Arcane · Perlica · Gilberta
Arcane (WILL) · Perlica · Gilberta
Medium Boss / Single-target
Maygi - Arcane · Perlica · Gilberta
Arcane (WILL) · Perlica · Gilberta
The guide's reference team and the highest overall performer on a single target: Arcane gifts a Nature Infliction stack with her Combo and with her Ultimate, Perlica sets the loop tempo with her Combo, and Gilberta charges so fast she fits two Ultimates per rotation. A 57-second rotation, calculated at 71K team DPS with BIS weapons.
In the app 4-step rotation · 2 rotation variants · 4 gear builds · 4 pros / 4 cons · 5 pitfalls · 4 matchup notes · video walkthrough
Maygi - No Gilberta: Fluorite
Arcane (WILL) · Fluorite · Perlica
Medium Boss / Single-target
Maygi - No Gilberta: Fluorite
Arcane (WILL) · Fluorite · Perlica
The same rotation concept when you do not have Gilberta: Fluorite takes her seat and provides 3 free Nature Inflictions per rotation (against Gilberta's 2) at the cost of buffing nobody. A 55-second rotation and 56K team DPS. If you do not have Arcane either, the team with Antal as the "Arcane at home" has its own guide.
In the app 3-step rotation · 1 rotation variant · 4 gear builds · 4 pros / 4 cons · 3 pitfalls · 3 matchup notes · video walkthrough
Maygi - NO Arcane, no Gilberta: Antal
Antal · Fluorite · Perlica (no other 6-star)
Medium Boss / Single-target
Maygi - NO Arcane, no Gilberta: Antal
Antal · Fluorite · Perlica (no other 6-star)
The team for those who have neither Arcane nor Gilberta: no other 6-star operator. Antal plays "Arcane at home" with Detonation Unit and the Qingbo set, duplicating with his Combo the Nature Infliction Fluorite applies, at the cost of a 100 SP tax. The rotation concept is the same as the rest of the guide's teams; the author warns that without Arcane the results leave a bit to be desired, as her substitutes have little to no buffing.
In the app 2-step rotation · 2 rotation variants · 4 gear builds · 4 pros / 4 cons · 4 pitfalls · 3 matchup notes · video walkthrough
Maygi - Arcane · Ardelia · Liino
Arcane (WILL) · Ardelia · Liino
Low Boss / Multi-target
Maygi - Arcane · Ardelia · Liino
Arcane (WILL) · Ardelia · Liino
Very strong and simple: Ardelia is fed 100 SP for a massive, long-duration debuff, and Liino, Will-maxed, amplifies with her Ultimate and applies the Electrification Perlica used to. The downside is that only Arcane stacks Nature Infliction, so the rotation stretches to 75 seconds; in exchange it shines against several enemies. 69K team DPS, second in the video.
In the app 3-step rotation · 1 rotation variant · 4 gear builds · 4 pros / 3 cons · 4 pitfalls · 1 matchup note · video walkthrough
YZ-月咒 - Arcane (WILL) · Perlica · Liino
Arcane (WILL) · Perlica · Liino; a 9-arrow cold start and an infinite 5-arrow loop
Medium Boss / Single-target
YZ-月咒 - Arcane (WILL) · Perlica · Liino
Arcane (WILL) · Perlica · Liino; a 9-arrow cold start and an infinite 5-arrow loop
The popular Typhoeus team according to the author: Typhoeus, Arcane in WILL form, Perlica and Liino. Perlica is the swappable seat — with Ardelia the single-target damage is higher and more extreme, but with Perlica there is one Battle Skill less to press, the axis reads simpler and more direct, and that makes it the version for anyone starting to learn the team; the Ardelia one goes in another video. The video focuses on understanding why the loop holds: 'I cast everything and the HP does not move' comes from not having understood Typhoeus. It all reduces to two cycles: the 9-arrow one, which cold-starts the team, and the 5-arrow one, which repeats endlessly.
In the app 3-step rotation · 2 rotation variants · 4 gear builds · 4 pros / 4 cons · 6 pitfalls · 2 matchup notes · video walkthrough
YZ-月咒 - Arcane (WILL) · Perlica · Xaihi
Arcane (WILL) · Perlica · Xaihi; no Gilberta, no Liino: one charge lap and one burst lap
Low (formulaic axis, per the author) Boss / Single-target
YZ-月咒 - Arcane (WILL) · Perlica · Xaihi
Arcane (WILL) · Perlica · Xaihi; no Gilberta, no Liino: one charge lap and one burst lap
The Typhoeus team without Gilberta or Liino: Arcane in WILL form, Perlica and Xaihi in seats 3 and 4, and Perlica can be swapped for Fluorite with the same plan. The author presents it as a formulaic axis for lazy players: two phases, one charge lap and one burst lap; the first charge lap starts with 9 arrows and every one after it needs only 5, and the author holds it is not behind the teams with Gilberta or Liino. The only thing to manage is the Cryo Infliction left by the Combo from Xaihi, and that is solved by turning it into Corrosion with the Battle Skill from Arcane, which even improves the total damage; it does not ask for fine hands.
In the app 2-step rotation · 2 rotation variants · 4 gear builds · 5 pros / 5 cons · 6 pitfalls · 3 matchup notes · video walkthrough
烟花弎月xyz - Arcane (WILL) · Gilberta · Xaihi
Arcane (WILL) · Gilberta · Xaihi; a level 4 Corrosion axis against the Skydrummer
Medium (four Cryo and synced Ultimates) Boss / Single-target
烟花弎月xyz - Arcane (WILL) · Gilberta · Xaihi
Arcane (WILL) · Gilberta · Xaihi; a level 4 Corrosion axis against the Skydrummer
A commented demo against the Echoes of War Skydrummer (死兽鸣吼, Brutal difficulty) with an account the author calls mid-to-high investment: Typhoeus 1+1 with her BIS weapon fully refined and ordinary supports (Arcane with 455 Will, Xaihi with 444 Intellect and Gilberta at potential 0 with Arcane's weapon borrowed). The idea is a Corrosion-specialized axis: stack four Cryo with Xaihi and convert them at once with the Battle Skill from Arcane into a level 4 Corrosion, and sync the Ultimate from Gilberta with the Combo from Typhoeus so her five arrows land with everything on top. The boss falls in 1:32. Without Gilberta, the author suggests Tangtang, Perlica or Ardelia, with no axis of their own.
In the app 4-step rotation · 2 rotation variants · 4 gear builds · 5 pros / 5 cons · 6 pitfalls · 2 matchup notes · video walkthrough
YZ-月咒 - NO Arcane: Purrchena · Perlica · Liino
Purrchena · Perlica · Liino; the 无诀队 (no-Arcane team): three charge laps and one burst lap, five arrows per lap
Low (quick-start guide) Boss / Single-target
YZ-月咒 - NO Arcane: Purrchena · Perlica · Liino
Purrchena · Perlica · Liino; the 无诀队 (no-Arcane team): three charge laps and one burst lap, five arrows per lap
The Typhoeus team for anyone without Arcane (无诀队): Purrchena takes the Nature Infliction seat the team needs no matter what, and Perlica and Liino stay as in the Arcane version. The author presents her as the best Arcane substitute for now: each Nature layer costs her 80 SP, or 60 if her shield blocks a hit, and according to the author she hangs it faster and with less SP than Fluorite, although as a pure applier she stays below Arcane. A 5-arrow axis: three charge laps and one burst lap, and the Combo from Typhoeus is saved to open the next lap, because its Barrage Array leaves 6s of Nature Burst DMG Taken. Purrchena's Combo and Ultimate have no fixed slot; the author also suggests her for high-pressure content, where survival matters.
In the app 3-step rotation · 1 rotation variant · 4 gear builds · 5 pros / 5 cons · 5 pitfalls · 2 matchup notes · video walkthrough
终末协约攻略组 - NO Arcane: Purrchena · Perlica · Xaihi
Purrchena · Perlica · Xaihi; the transitional Nature team: Typhoeus on basics and every Combo as soon as it lights
Low (no axis to memorize) General / Survival
终末协约攻略组 - NO Arcane: Purrchena · Perlica · Xaihi
Purrchena · Perlica · Xaihi; the transitional Nature team: Typhoeus on basics and every Combo as soon as it lights
The Typhoeus Nature team for newer players who do not have Arcane yet: Purrchena applies Nature Infliction with the second press of her Battle Skill, Perlica forces Electrification with her Combo and Xaihi fires her Ultimate, which grants Nature Amp. There is no axis to memorize: Typhoeus is controlled with basics and Final Strikes, and every Combo and every Ultimate goes out as soon as it lights. According to the author, the total damage sits somewhat below the usual teams, in exchange for the survivability Purrchena brings. Xaihi's seat accepts Gilberta, Liino or Arcane (WILL).
In the app 3-step rotation · 4 gear builds · 5 pros / 4 cons · 4 pitfalls · 2 matchup notes · video walkthrough

Zhuang Fangyi
Closed-loop Electric Striker: the Mantra of Sundering battle skill consumes Electrification to forge Sunderblades and fire Thunder Strikes, and the Breath of Transformation combo re-applies Electrification to feed it again. The Smiting Tempest ultimate (Empyrean of Truth) gifts the first battle skill with 3 Sunderblades and speeds up the whole kit.
8 comps

Zhuang Fangyi
Closed-loop Electric Striker: the Mantra of Sundering battle skill consumes Electrification to forge Sunderblades and fire Thunder Strikes, and the Breath of Transformation combo re-applies Electrification to feed it again. The Smiting Tempest ultimate (Empyrean of Truth) gifts the first battle skill with 3 Sunderblades and speeds up the whole kit.
YZ-月咒 - Electric double-ult (Gilberta)
Gilberta with Stanza casts TWO ultimates inside Zhuang Fangyi's ultimate window
Mid
YZ-月咒 - Electric double-ult (Gilberta)
Gilberta with Stanza casts TWO ultimates inside Zhuang Fangyi's ultimate window
Zhuang Fangyi carries with a closed Electric loop; Gilberta, Arclight and Perlica feed Electric Infliction and Electrification. The hook: Gilberta, holding Stanza of Memorials (no Delivery Guaranteed needed), fits two ultimates inside Zhuang Fangyi's 25s ultimate window (double-ult) — being Nature while Zhuang Fangyi is Electric, the cross-element Stanza ATK bonus reaches the carry. YZ recommends it for its fast hot start; the cold start is also quick since Gilberta spends no battle skill.

In the app 3-step rotation · 4 gear builds · 4 pros / 4 cons · 3 pitfalls · 2 matchup notes · video walkthrough
YZ-月咒 - Electric 庄佩弧安 (Antal)
Antal brings susceptibility, amp and an extra electric stack; cold and hot start
High
YZ-月咒 - Electric 庄佩弧安 (Antal)
Antal brings susceptibility, amp and an extra electric stack; cold and hot start
Zhuang Fangyi + Perlica + Arclight + Antal (庄佩弧安). Antal is the reason for the team: his battle skill applies a 60s Electric and Heat susceptibility, his ultimate gives the team Electric and Heat amp, his Detonation Unit weapon adds Arts DMG Taken and the Eternal Xiranite set gives the REST of the team DMG Dealt +16% every time he applies Amp or Susceptible, which is exactly what his ultimate and his battle skill do; on top of that her combo drops an extra Electric Infliction stack that makes Zhuang Fangyi's Electrification worth more. Same closed loop; swapping Antal for any other teammate barely changes the play.
In the app 3-step rotation · 3 gear builds · 3 pros / 3 cons · 3 pitfalls · 2 matchup notes · video walkthrough
YZ-月咒 - Electric with Liino 2.0 (Arcane, WILL form)
Liino · Arcane · Perlica; reworked cold start, stable even when interrupted
Medium
YZ-月咒 - Electric with Liino 2.0 (Arcane, WILL form)
Liino · Arcane · Perlica; reworked cold start, stable even when interrupted
Zhuang Fangyi + Liino + Arcane + Perlica, in the author's own 2.0 version. The 1.0 start came from the previous game version, and with Liino on the team it lost stability: interrupt the basic attack often enough and the axis scrambled. This execution reorders the cold start so that no longer happens, and it also removes the most awkward part of 1.0: you no longer watch the cooldown of the Combo from Liino. Per the author, it is simpler to execute and better suited to daily use.
In the app 3-step rotation · 4 gear builds · 4 pros / 4 cons · 5 pitfalls · 2 matchup notes · video walkthrough
YZ-月咒 - Electric with Liino (Arclight)
Liino · Arclight · Perlica; a three-lap baby axis and an advanced axis
Low (the advanced axis asks more)
YZ-月咒 - Electric with Liino (Arclight)
Liino · Arclight · Perlica; a three-lap baby axis and an advanced axis
Zhuang Fangyi + Liino + Arclight + Perlica: the 电弧体系, the sibling of the Arcane version. The author repeats his verdict — the damage gap between the two versions is not large and you choose by comfort — and delivers what he previewed in that team's 2.0: with Arclight the flow runs with SP to spare. The video teaches two executions: a baby axis, meant to be learned in minutes with very comfortable charge, and an advanced axis that eats every team buff and aims at the damage ceiling.
In the app 2-step rotation · 1 rotation variant · 4 gear builds · 4 pros / 4 cons · 5 pitfalls · 1 matchup note · video walkthrough
YZ-月咒 - Electric with Arcane, no Liino (baby axis)
Arcane · Arclight · Perlica; a two-lap baby axis and the standard start with the slab
Low (baby axis); medium (standard start)
YZ-月咒 - Electric with Arcane, no Liino (baby axis)
Arcane · Arclight · Perlica; a two-lap baby axis and the standard start with the slab
Zhuang Fangyi + Arcane + Arclight + Perlica: the author's first version with Arcane in the Electric team, before Liino (he says in the description that the standard version with Liino would come later). Four changes from the previous team: the start is faster (a low-potential Zhuang Fangyi with the LYNX Slab needs 4 Battle Skills instead of 5 to fill her Ultimate), the damage environment improves with the 6s slow motion of the Combo from Arcane, the burst still hangs level 4 Electrification, and the Battle Skill from Perlica plus the Combo from Arcane hang layers in an area, so against groups the start saves SP. The video brings two executions: the baby axis (two identical laps and burst) and the standard start with the LYNX Slab.
In the app 2-step rotation · 1 rotation variant · 4 gear builds · 4 pros / 4 cons · 6 pitfalls · 2 matchup notes · video walkthrough
Zn0nym0us - The most consistent ZF (Arclight and Alesh)
Arclight · Alesh · Perlica; difficulty 2.5/5 — the most reliable 0-0 loop for the normal rotation
Medium-low (2.5/5 from the author; damage 4/5)
Zn0nym0us - The most consistent ZF (Arclight and Alesh)
Arclight · Alesh · Perlica; difficulty 2.5/5 — the most reliable 0-0 loop for the normal rotation
«Probably the most consistent team for the normal rotation with Zhuang Fangyi» (1.2 guide, before Liino). The whole kit of ZF consumes Electric Infliction and Electrification to scale her damage and charge a 240 Ultimate — and this quartet pays for it cold, with no starting Ultimate. The video also kills a myth: the Battle Skill from Arclight IS used, even though it consumes the Electrification, because the Ultimate arrives anyway and her talent returns 50-60% Electric DMG to the team. 4/5 damage, 2.5/5 difficulty.
In the app 3-step rotation · 4 gear builds · 3 pros / 2 cons · 2 pitfalls · 1 matchup note · video walkthrough
Zn0nym0us - ZF with Akekuri (SP for the Ultimate)
Arclight · Akekuri · Perlica; difficulty 2.5/5 — the Flares pay for the transformation
Medium-low (2.5/5 from the author; damage 3.5/5)
Zn0nym0us - ZF with Akekuri (SP for the Ultimate)
Arclight · Akekuri · Perlica; difficulty 2.5/5 — the Flares pay for the transformation
The SP budget variant (1.2 guide, before Liino): the same lap as the consistent ZF, with Akekuri in the Alesh seat. It loses a bit of damage — 3.5/5 against 4/5 — but her Flare Ultimate refills the SP during the transformation, right where ZF devours it the most. The two new rules: wait until there are nine Sunderblades on the ground before the Ultimate from Akekuri, and do not let the SP hit the cap during the transformation.
In the app 2-step rotation · 4 gear builds · 3 pros / 2 cons · 2 pitfalls · 1 matchup note · video walkthrough
Zn0nym0us - ZF with SP to spare (Alesh and Akekuri)
Alesh · Akekuri · Perlica; difficulty 2/5 — no Arclight, with a reserve for cancelling attacks
Low (2/5 from the author; damage 3/5)
Zn0nym0us - ZF with SP to spare (Alesh and Akekuri)
Alesh · Akekuri · Perlica; difficulty 2/5 — no Arclight, with a reserve for cancelling attacks
The only team of the video without Arclight (1.2 guide, before Liino): «the rotation is quite simple». Alesh inherits the Thermite Cutter, Akekuri brings the Flares, and the new rule is about formation: Perlica goes BEFORE ZF in the team order, so her Combo fires first and the Electrification is already set when the Array from ZF converts. 3/5 damage with 2/5 difficulty — and so much reserve SP that you can spend it cancelling enemy attacks.
In the app 2-step rotation · 2 gear builds · 3 pros / 2 cons · 3 pitfalls · 1 matchup note · video walkthrough

Avywenna
Electric lance Striker. She scatters Thunderlances across the field with her Combo Skills and yanks them all back at once with her Battle Skill — almost all her damage lands on that recall, in a very short window. The lances return in a straight line, so positioning is everything.
3 comps
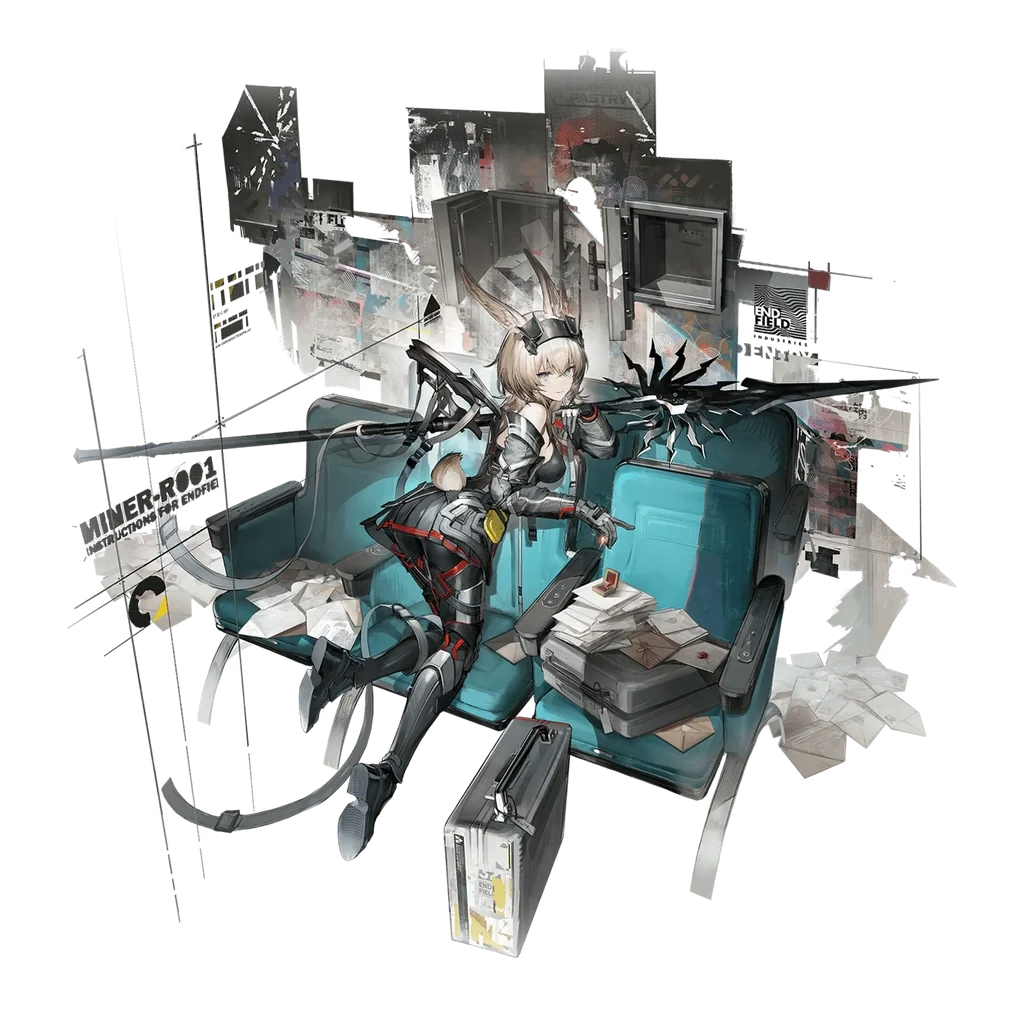
Avywenna
Electric lance Striker. She scatters Thunderlances across the field with her Combo Skills and yanks them all back at once with her Battle Skill — almost all her damage lands on that recall, in a very short window. The lances return in a straight line, so positioning is everything.
Maygi - Full Electric
Arclight · Perlica · Antal
High Boss / Single-target
Maygi - Full Electric
Arclight · Perlica · Antal
The benchmark Electric single-target team: stack lances on the field and recall them all at once with every buff stacked.
In the app 2-step rotation · 1 rotation variant · 4 gear builds · 4 pros / 4 cons · 4 pitfalls · 3 matchup notes · video walkthrough
Electric + Corrosion
Perlica · Antal · Gilberta
High Flexible / AoE + Boss
Electric + Corrosion
Perlica · Antal · Gilberta
Gilberta comes in for Arclight and converts the Electric Infliction into Corrosion. The burst is the highest of the three teams, but her field lasts 5 s, so the timing is strict.
In the app 3-step rotation · 4 gear builds · 4 pros / 4 cons · 4 pitfalls · 2 matchup notes · video walkthrough
Comfort / Link
Akekuri · Perlica · Gilberta
Medium AoE / Comfort
Comfort / Link
Akekuri · Perlica · Gilberta
The comfortable version with Akekuri: her Link powers the recall with no stack timing. Lower ceiling, much easier to play.
In the app 2-step rotation · 4 gear builds · 4 pros / 4 cons · 4 pitfalls · 2 matchup notes · video walkthrough

Camille
Functional Heat vanguard. Applies Heat Infliction, refunds SP to the team, debuffs with Weakness and Heat Susceptibility, and hands out Link — a rare buff that empowers the team's next Battle Skill or Ultimate.
2 comps
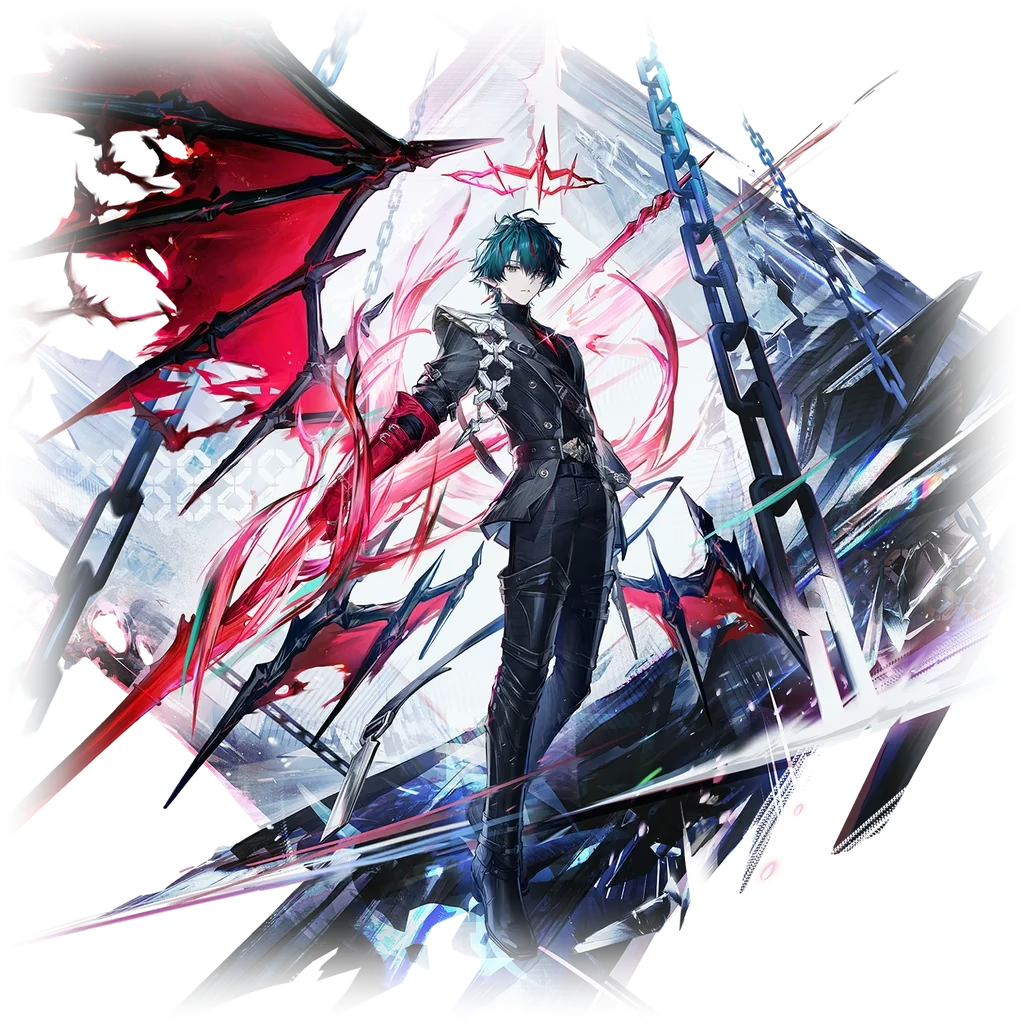
Camille
Functional Heat vanguard. Applies Heat Infliction, refunds SP to the team, debuffs with Weakness and Heat Susceptibility, and hands out Link — a rare buff that empowers the team's next Battle Skill or Ultimate.
叫我棉被 - Laevatain Fire
The classic fire team, now with Link management
Mid
叫我棉被 - Laevatain Fire
The classic fire team, now with Link management
Laevatain is still the engine: 4 Molten stacks, Enhanced Battle Skill and Ultimate. Camille adds Heat Susceptibility, Weakness, SP refunds and the Link buff for her Enhanced Battle Skills. Antal takes the 4th slot, or Wulfgard if the cold start is very demanding.

In the app 5-step rotation · 1 rotation variant · 3 gear builds · 3 pros / 2 cons · 4 pitfalls · 2 matchup notes · video walkthrough
叫我棉被 - Rossi Mixed Physical
Double vanguard: near-infinite SP for Rossi and Mi Fu
Mid-High
叫我棉被 - Rossi Mixed Physical
Double vanguard: near-infinite SP for Rossi and Mi Fu
Camille + Pogranichnik form a double-vanguard core with nearly bottomless SP: infinite-fire mode for Rossi (main control) and Mi Fu (Battle Skill burst at 3 Vulnerability stacks). 4th-slot alternatives: Ardelia (double Susceptibility) or Ember (survivability + free Vulnerability).
In the app 4-step rotation · 1 rotation variant · 4 gear builds · 3 pros / 2 cons · 3 pitfalls · 2 matchup notes · video walkthrough

Laevatain
Heat carry (Striker). Her engine is the 4 Molten stacks: supports apply Heat to the enemy and Laevatain absorbs it with Final Strikes to turn it into Molten; at 4 Molten she fires her Enhanced Battle Skill, and her Ultimate opens the burn window.
2 comps
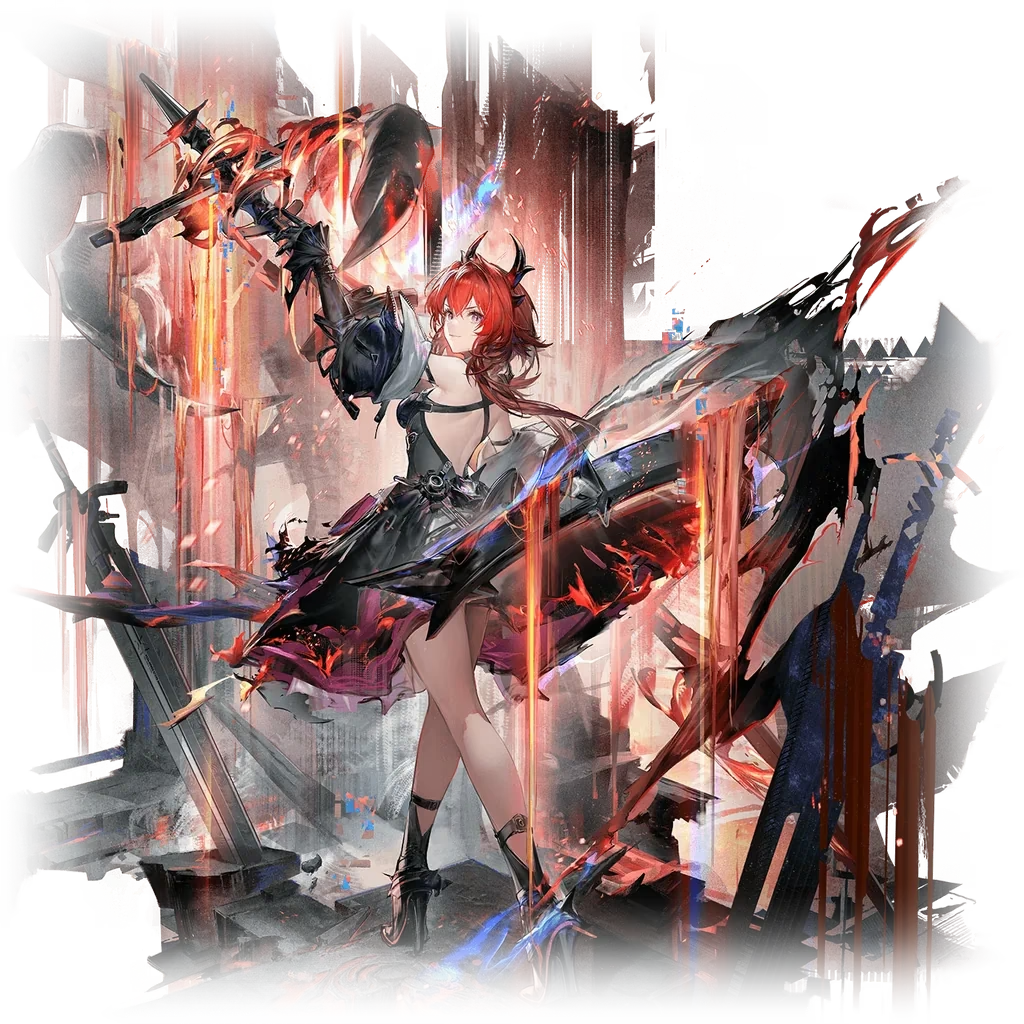
Laevatain
Heat carry (Striker). Her engine is the 4 Molten stacks: supports apply Heat to the enemy and Laevatain absorbs it with Final Strikes to turn it into Molten; at 4 Molten she fires her Enhanced Battle Skill, and her Ultimate opens the burn window.
YZ-月咒 - Laevatain Fire
Two charge rotations to fill Laevatain's Ultimate and burst: simple axis (stable) or advanced (faster)
Mid (advanced: High)
YZ-月咒 - Laevatain Fire
Two charge rotations to fill Laevatain's Ultimate and burst: simple axis (stable) or advanced (faster)
Fire team with Laevatain as carry, Camille and Wulfgard loading Heat and Ardelia (小羊) arming the window. The plan: two identical charge rotations to fill Laevatain's Ultimate, then Ardelia consumes the Corrosion to apply Physical and Arts Susceptibility, everyone ults and you burn. YZ shows two versions: the simple axis (stable, no dupe requirements) and the advanced axis (faster startup by cancelling Wulfgard's Combo with his Ultimate to save 100 SP; needs Wulfgard at potential 5).
In the app 5-step rotation · 1 rotation variant · 3 gear builds · 4 pros / 4 cons · 5 pitfalls · 2 matchup notes · video walkthrough
YZ-月咒 - Fire with Arcane (Camille · Wulfgard)
Arcane (WILL form) · Camille · Wulfgard; two charge laps to 4 Molten and a free-form burst, with Ardelia as an option in Wulfgard's seat
Low-medium (wheelchair with Wulfgard)
YZ-月咒 - Fire with Arcane (Camille · Wulfgard)
Arcane (WILL form) · Camille · Wulfgard; two charge laps to 4 Molten and a free-form burst, with Ardelia as an option in Wulfgard's seat
The Laevatain fire team with Arcane the author owed since the first half of the patch: Arcane, Laevatain, Camille and Wulfgard. Arcane runs WILL form and only hangs layers: her Combo and her Ultimate copy the Heat Infliction already on the enemy, so each lap reaches 4 layers with two Battle Skills from Camille and the Combos from Arcane and Wulfgard, and one Final Strike converts them into Laevatain's 4 Molten. Wulfgard's seat admits Ardelia: with Wulfgard the execution is simpler and SP is plentiful; with Ardelia each lap spends one Battle Skill to hang Susceptibility and the single-target burst goes up, on top of bringing survival and healing. The video demonstrates the Wulfgard version.
In the app 3-step rotation · 1 rotation variant · 4 gear builds · 4 pros / 4 cons · 6 pitfalls · 2 matchup notes · video walkthrough

Last Rite
A Cryo assault built around a single button: her Combo, Winter's Devourer. It lights up when the enemy carries 3 or more Cryo Infliction stacks, consumes them all and hits with a huge extra multiplier per stack eaten, refunding Ultimate Energy on top. The theoretical ceiling was always sky-high; the problem was feeding her ice at that pace — and that is the team's job.
1 comp

Last Rite
A Cryo assault built around a single button: her Combo, Winter's Devourer. It lights up when the enemy carries 3 or more Cryo Infliction stacks, consumes them all and hits with a huge extra multiplier per stack eaten, refunding Ultimate Energy on top. The theoretical ceiling was always sky-high; the problem was feeding her ice at that pace — and that is the team's job.
烟花弎月xyz - Four Shatters a Second
Arcane (WILL) · Xaihi · flex 4th (Tangtang)
Low Boss / General
烟花弎月xyz - Four Shatters a Second
Arcane (WILL) · Xaihi · flex 4th (Tangtang)
The team that fixes Last Rite's Combo: it demands 3+ Cryo Infliction stacks per use and Arcane (in WILL form) gifts her a free one every cycle, with Susceptibility and crowd control on top. Xaihi amplifies and heals, and the 4th seat is picked by budget and hands: Tangtang if you own her, Snowshine for beginners, Fluorite or Perlica as cheap options. Easy to learn: two 4-ice cycles and the Ultimate package.
In the app 3-step rotation · 5 rotation variants · 4 pros / 3 cons · 5 pitfalls · 1 matchup note · video walkthrough

Perlica
Five-star Electric Caster who carries the damage here: her Battle Skill applies Electric Infliction and her Combo, fired by a Final Strike from the controlled operator, forces an Electrification. Her keystones give her ATK every time she applies Electrification (two stacks) and strengthen the Arts DMG Taken of her Combo's Electrification, and her Ultimate is a chunk of orbital debris crashing down with massive Electric damage. With the table set, she lands the one-million non-crit hit that opens Raaay丶's video.
1 comp

Perlica
Five-star Electric Caster who carries the damage here: her Battle Skill applies Electric Infliction and her Combo, fired by a Final Strike from the controlled operator, forces an Electrification. Her keystones give her ATK every time she applies Electrification (two stacks) and strengthen the Arts DMG Taken of her Combo's Electrification, and her Ultimate is a chunk of orbital debris crashing down with massive Electric damage. With the table set, she lands the one-million non-crit hit that opens Raaay丶's video.
Raaay丶 - Perlica main C (Arcane INT · Arclight · Liino)
Double Electrification for Perlica; Arclight is the SP engine
High (long axis; a simple version exists) Boss / Single-target
Raaay丶 - Perlica main C (Arcane INT · Arclight · Liino)
Double Electrification for Perlica; Arclight is the SP engine
The rotation class for the 诀佩弧梨 quartet (Arcane, Perlica, Arclight and Liino) by the author of the wheelchairs. The upfront warning: the team can be played the simple way, three supports and Arcane INT as the only C with the generic idea of converting two Inflictions into Corrosion, but if you chase the team's ceiling, Perlica and Arclight overturn the impression most players have of them and take the total damage and the axis to another dimension. Per the author's tests it is, among all the teams built around Arcane and Liino as the only six stars, the one with the highest ceiling and the most versatility, and overall it does not fall short of the author's 管诀赛钓 team. In exchange, strength is tied to investment: all four operators need raising, like the Perlica opening the video with a one-million non-crit hit.
In the app 6-step rotation · 2 rotation variants · 4 gear builds · 4 pros / 4 cons · 6 pitfalls · 3 matchup notes · video walkthrough